
Virginia Department of Transportation
Lift Bridge Hardware: Take-ups & Cap Nuts
Problem Solving, Infrastructure, Custom Hardware, CNC Steel Machining, Welding
VDOT needed solutions to a complex problem: the design and manufacture of large-scale high-precision parts for a tightly-phased repair/replacement infrastructure project. Tektonics delivered a turnkey solution within the required timeline.
Tektonics is a SWAM-certified business registered in the eVA portal to do business with the Commonwealth of Virginia. We are here to help with manufacturing and supplies of hardware and materials.
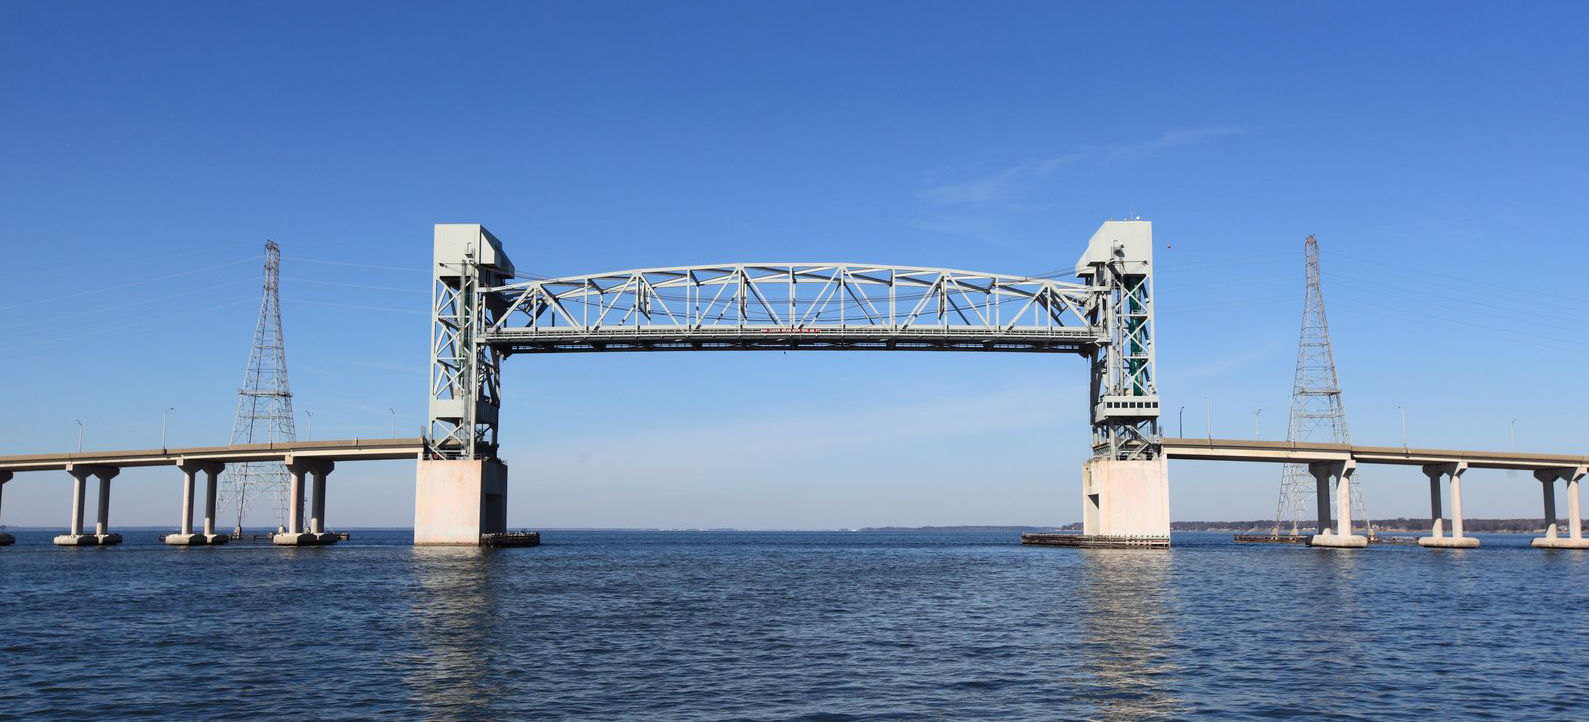
Infrastructure upfits for the James River Lift Bridge
-
What : The 4.5-mile James River Lift Bridge, Virginia’s longest state-maintained bridge, opened in 1928 as the first connector between the Peninsula and South Hampton Roads. The original two-lane bridge was replaced in 1982 with a wider four-lane lift span bridge designed to handle increased traffic volumes. With nearly one million vehicles using the JRLB each month, VDOT needed installation to occur within a specific phased installation timeline to prevent any bridge closure that could impede maritime trade and commerce.
Why: Movable bridges are complex machines and rely on precise alignment of moving parts. But even robust components require routine and periodic maintenance or replacement. The JRLB lift system was over 40 years old and based on documented wear and service life, key elements were due for replacement.
Considerations: VDOT had to take a phased approach to their planned repair and maintenance of the lift span. The project involved producing large-scale specialized hardware: giant take-ups, main take-up nuts and cap nuts. Precision machining was obviously a top priority, as we had to meet AASHTO standards, but our project planning and coordination experience, excellent project documentation and ability to receive and store large amounts of material were absolutely crucial to the job’s success.
Scroll through the photo carousel to check out our process
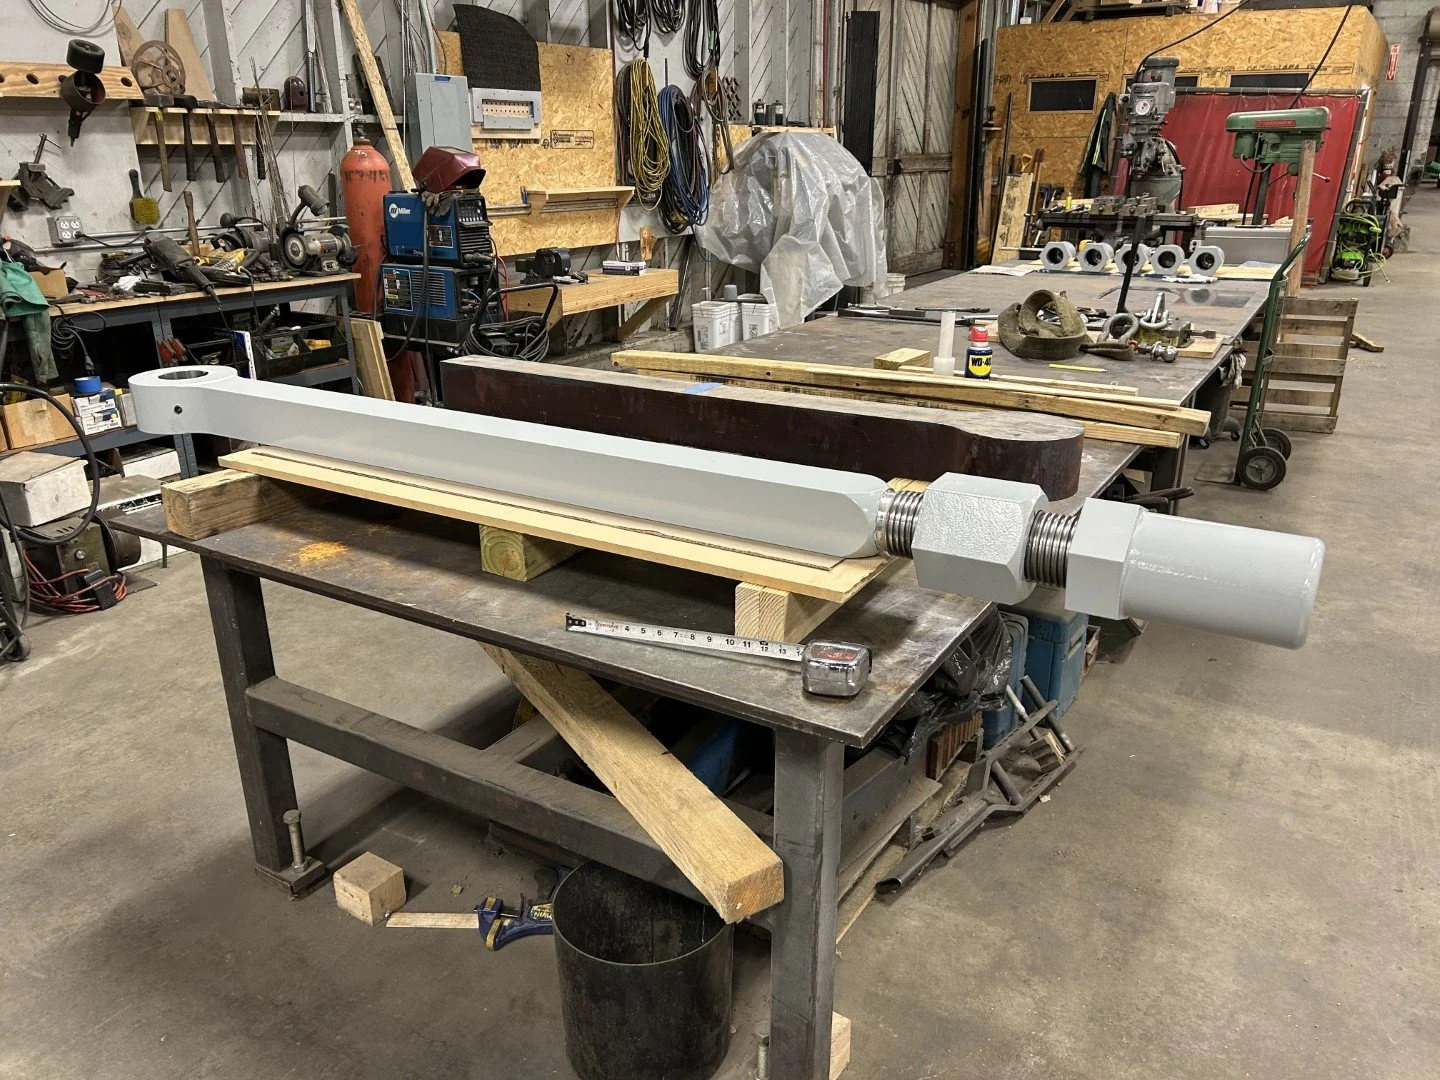
A quick glimpse of the 332 lb and 82 inch long finished and completed take-up assembly before moving into process photos: this is the main take-up with the main take-up nut and the cap nut.
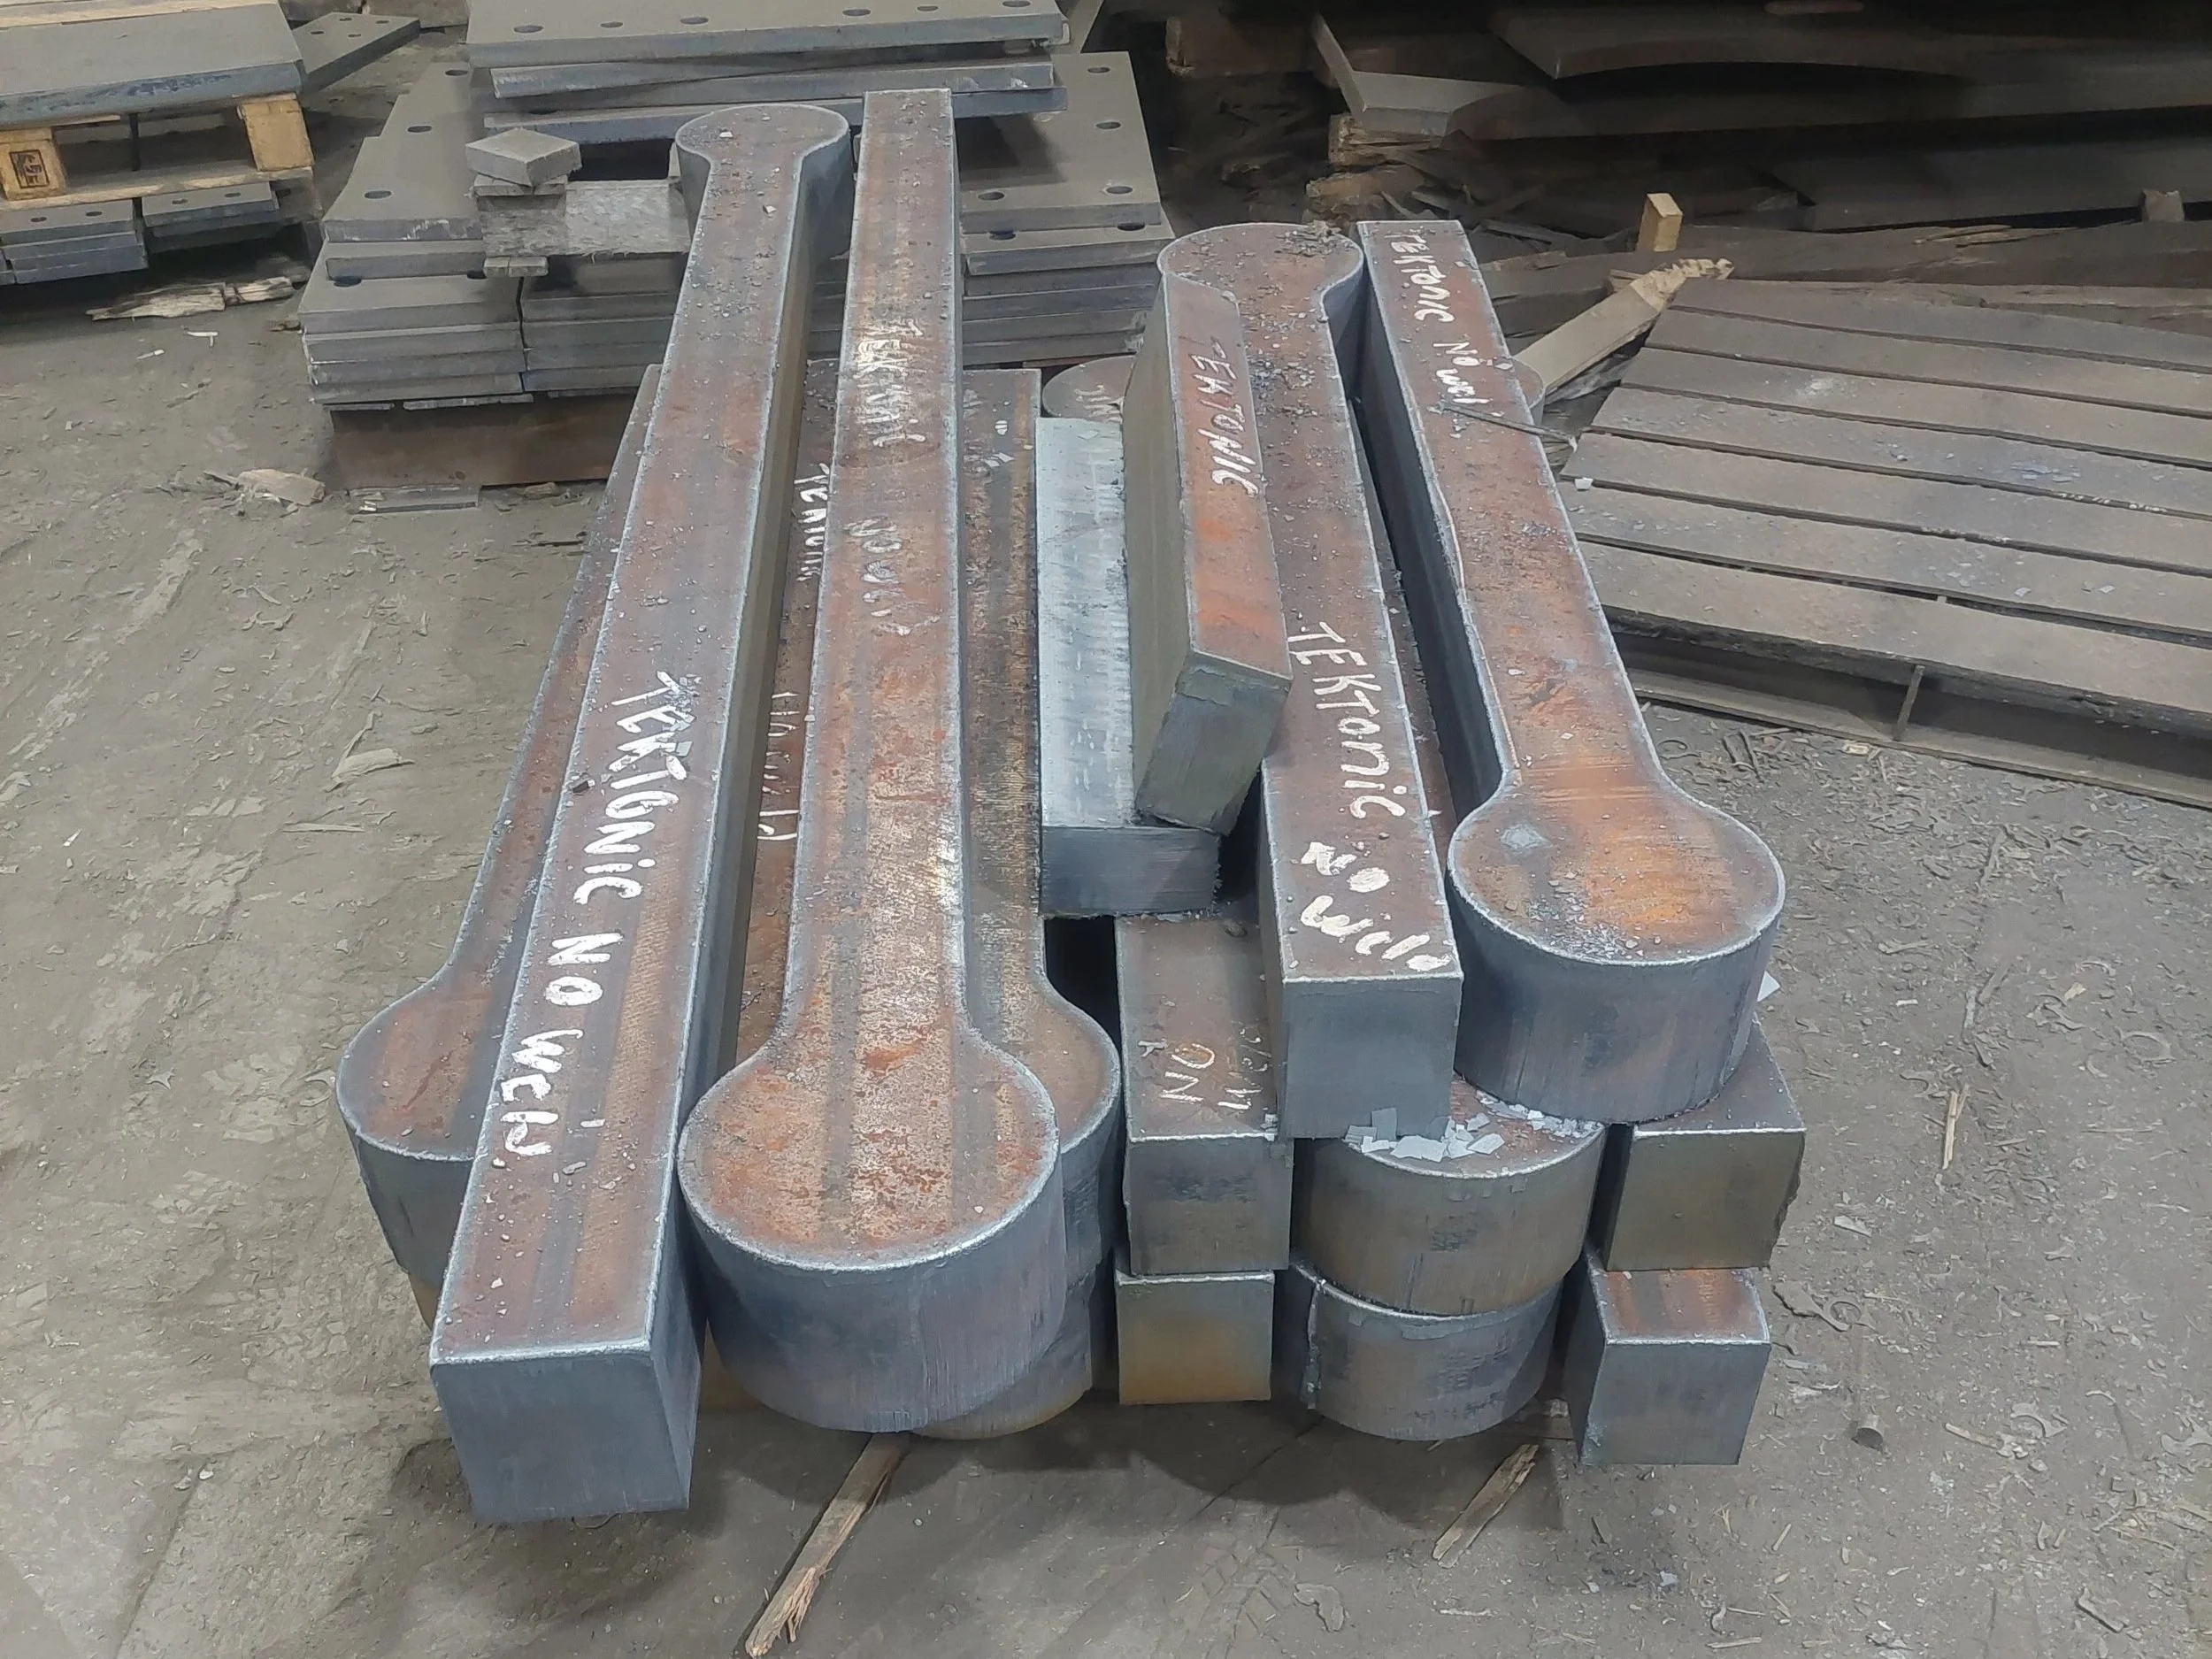
Custom-made Class D forged 5-inch thick master plates. The blanks were flame-cut 3/4 inch oversized from our net finished machined parts. Material: ASTM A668.
Once the flame-cut blanks were produced, they were stress-relieved and straightened before we machined them to 1/4 inch thicker than that of the finished blank you will see in the next slide.

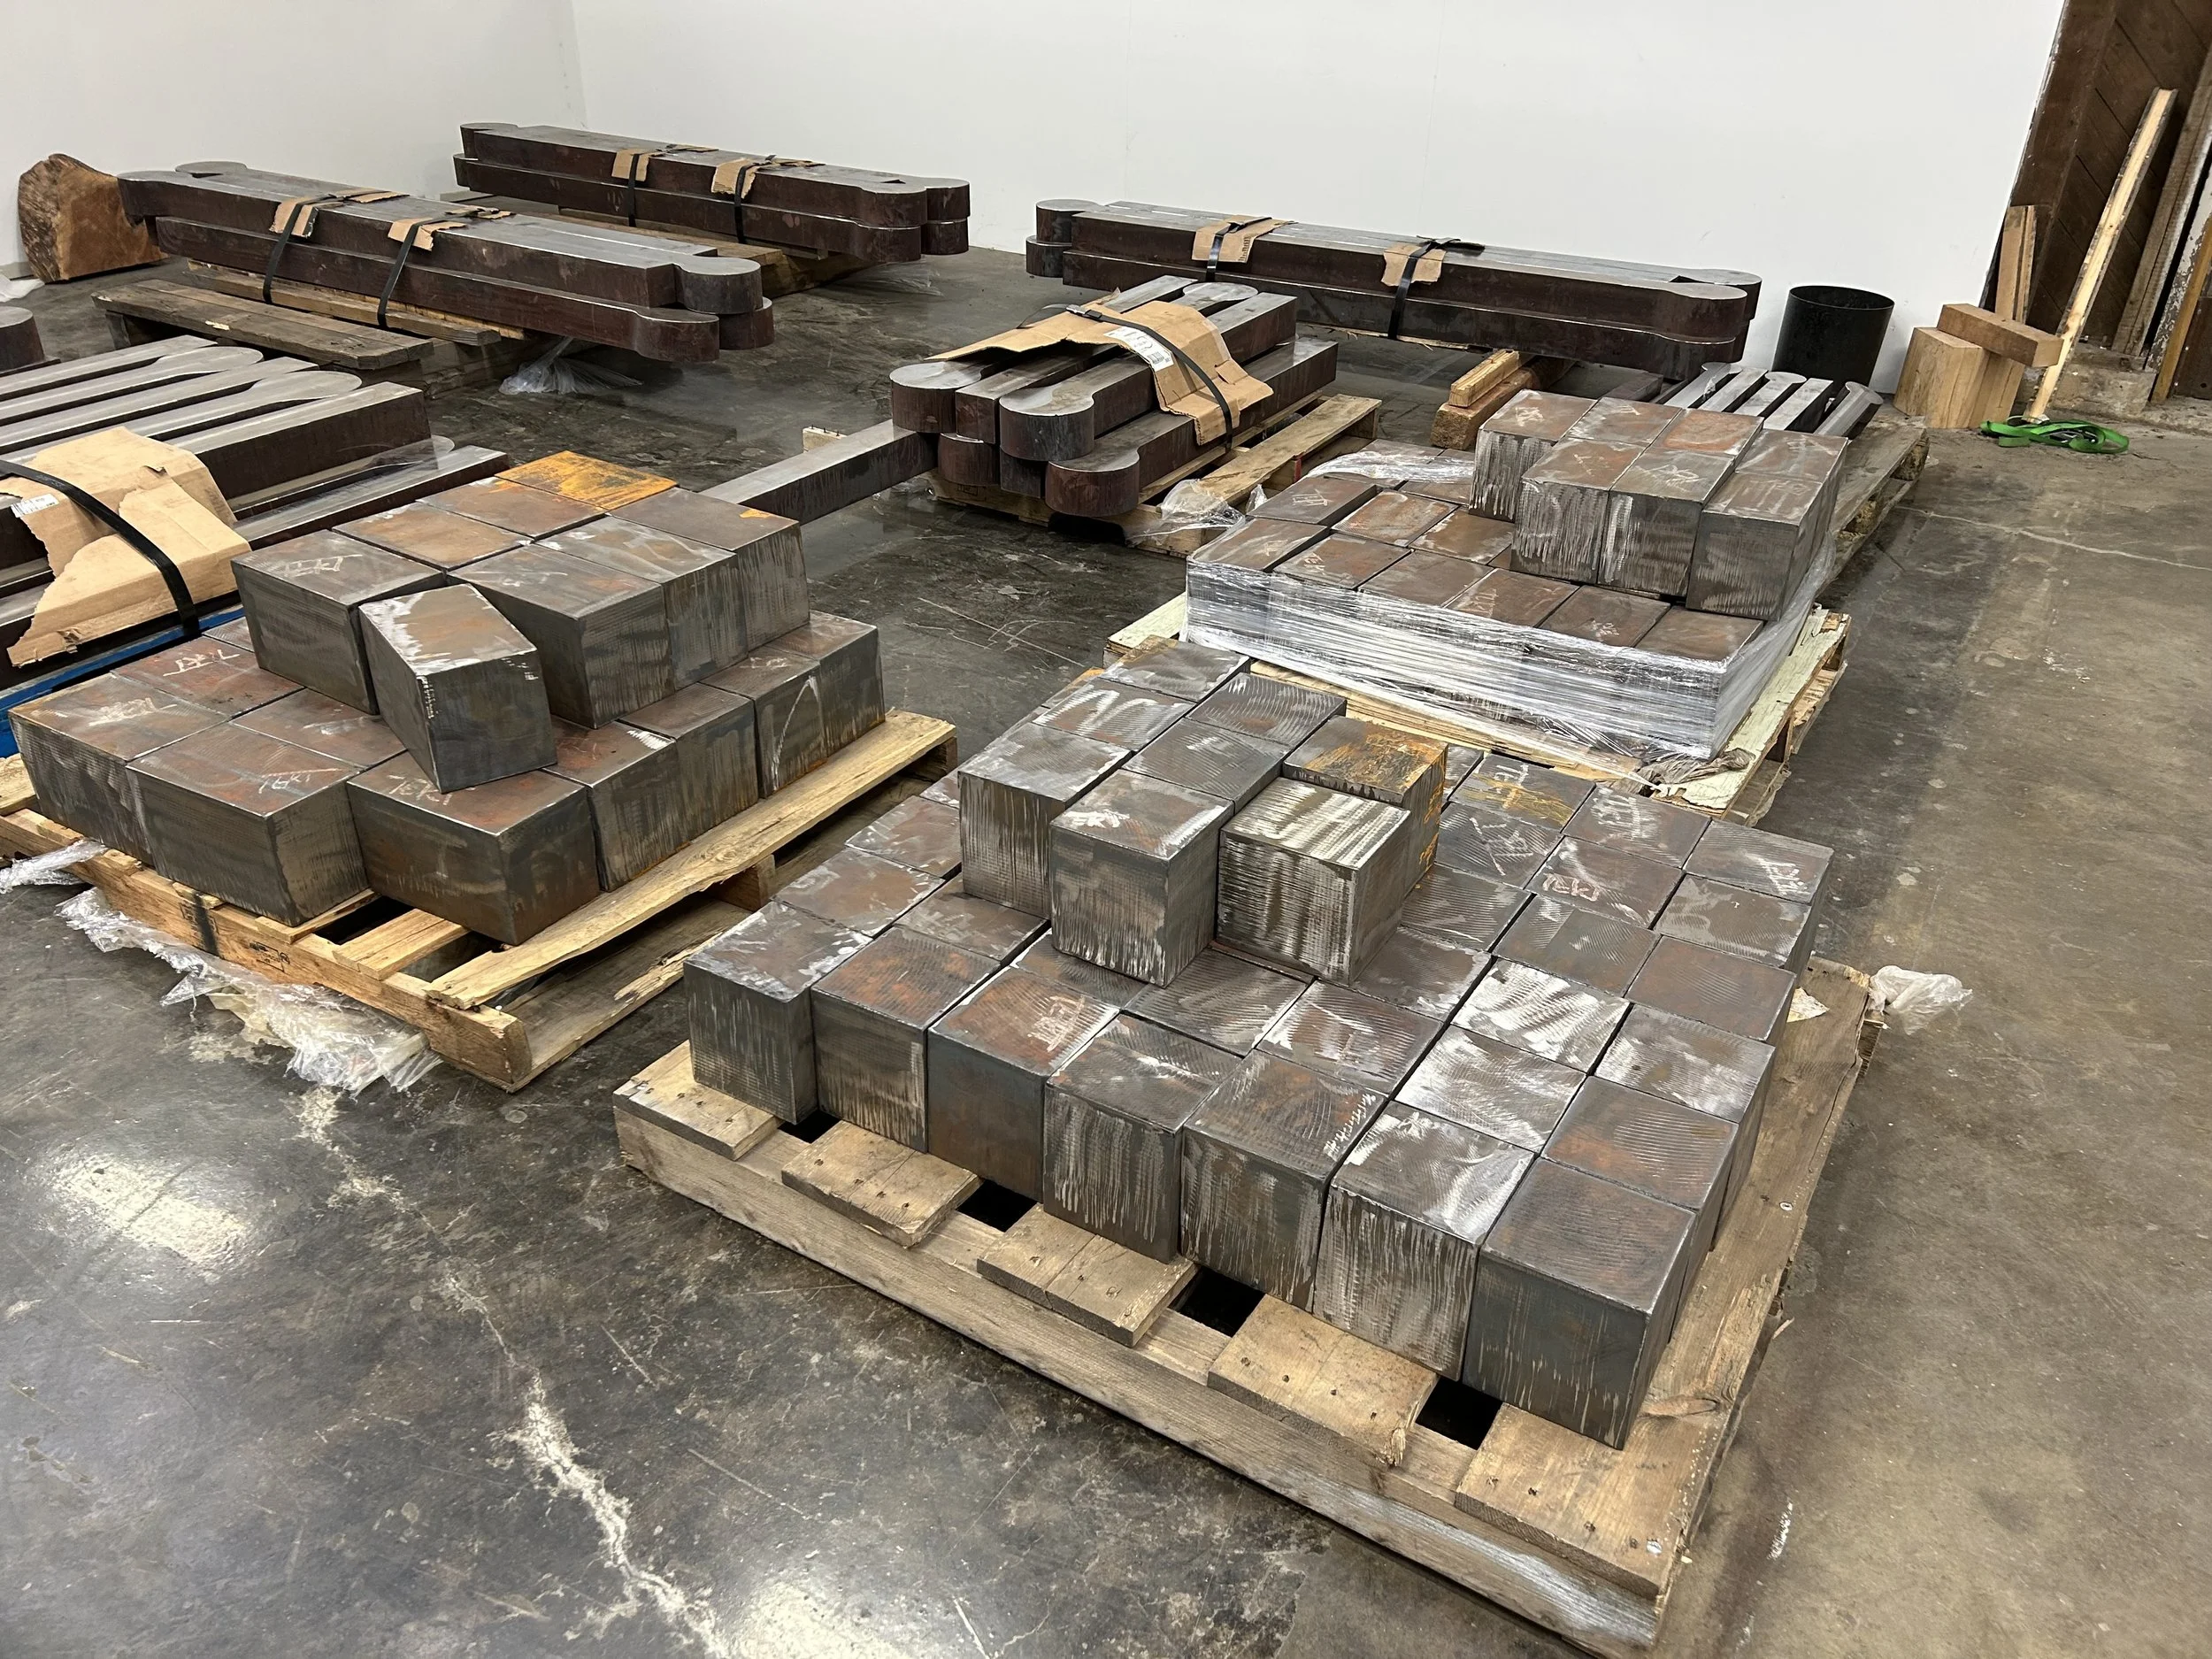
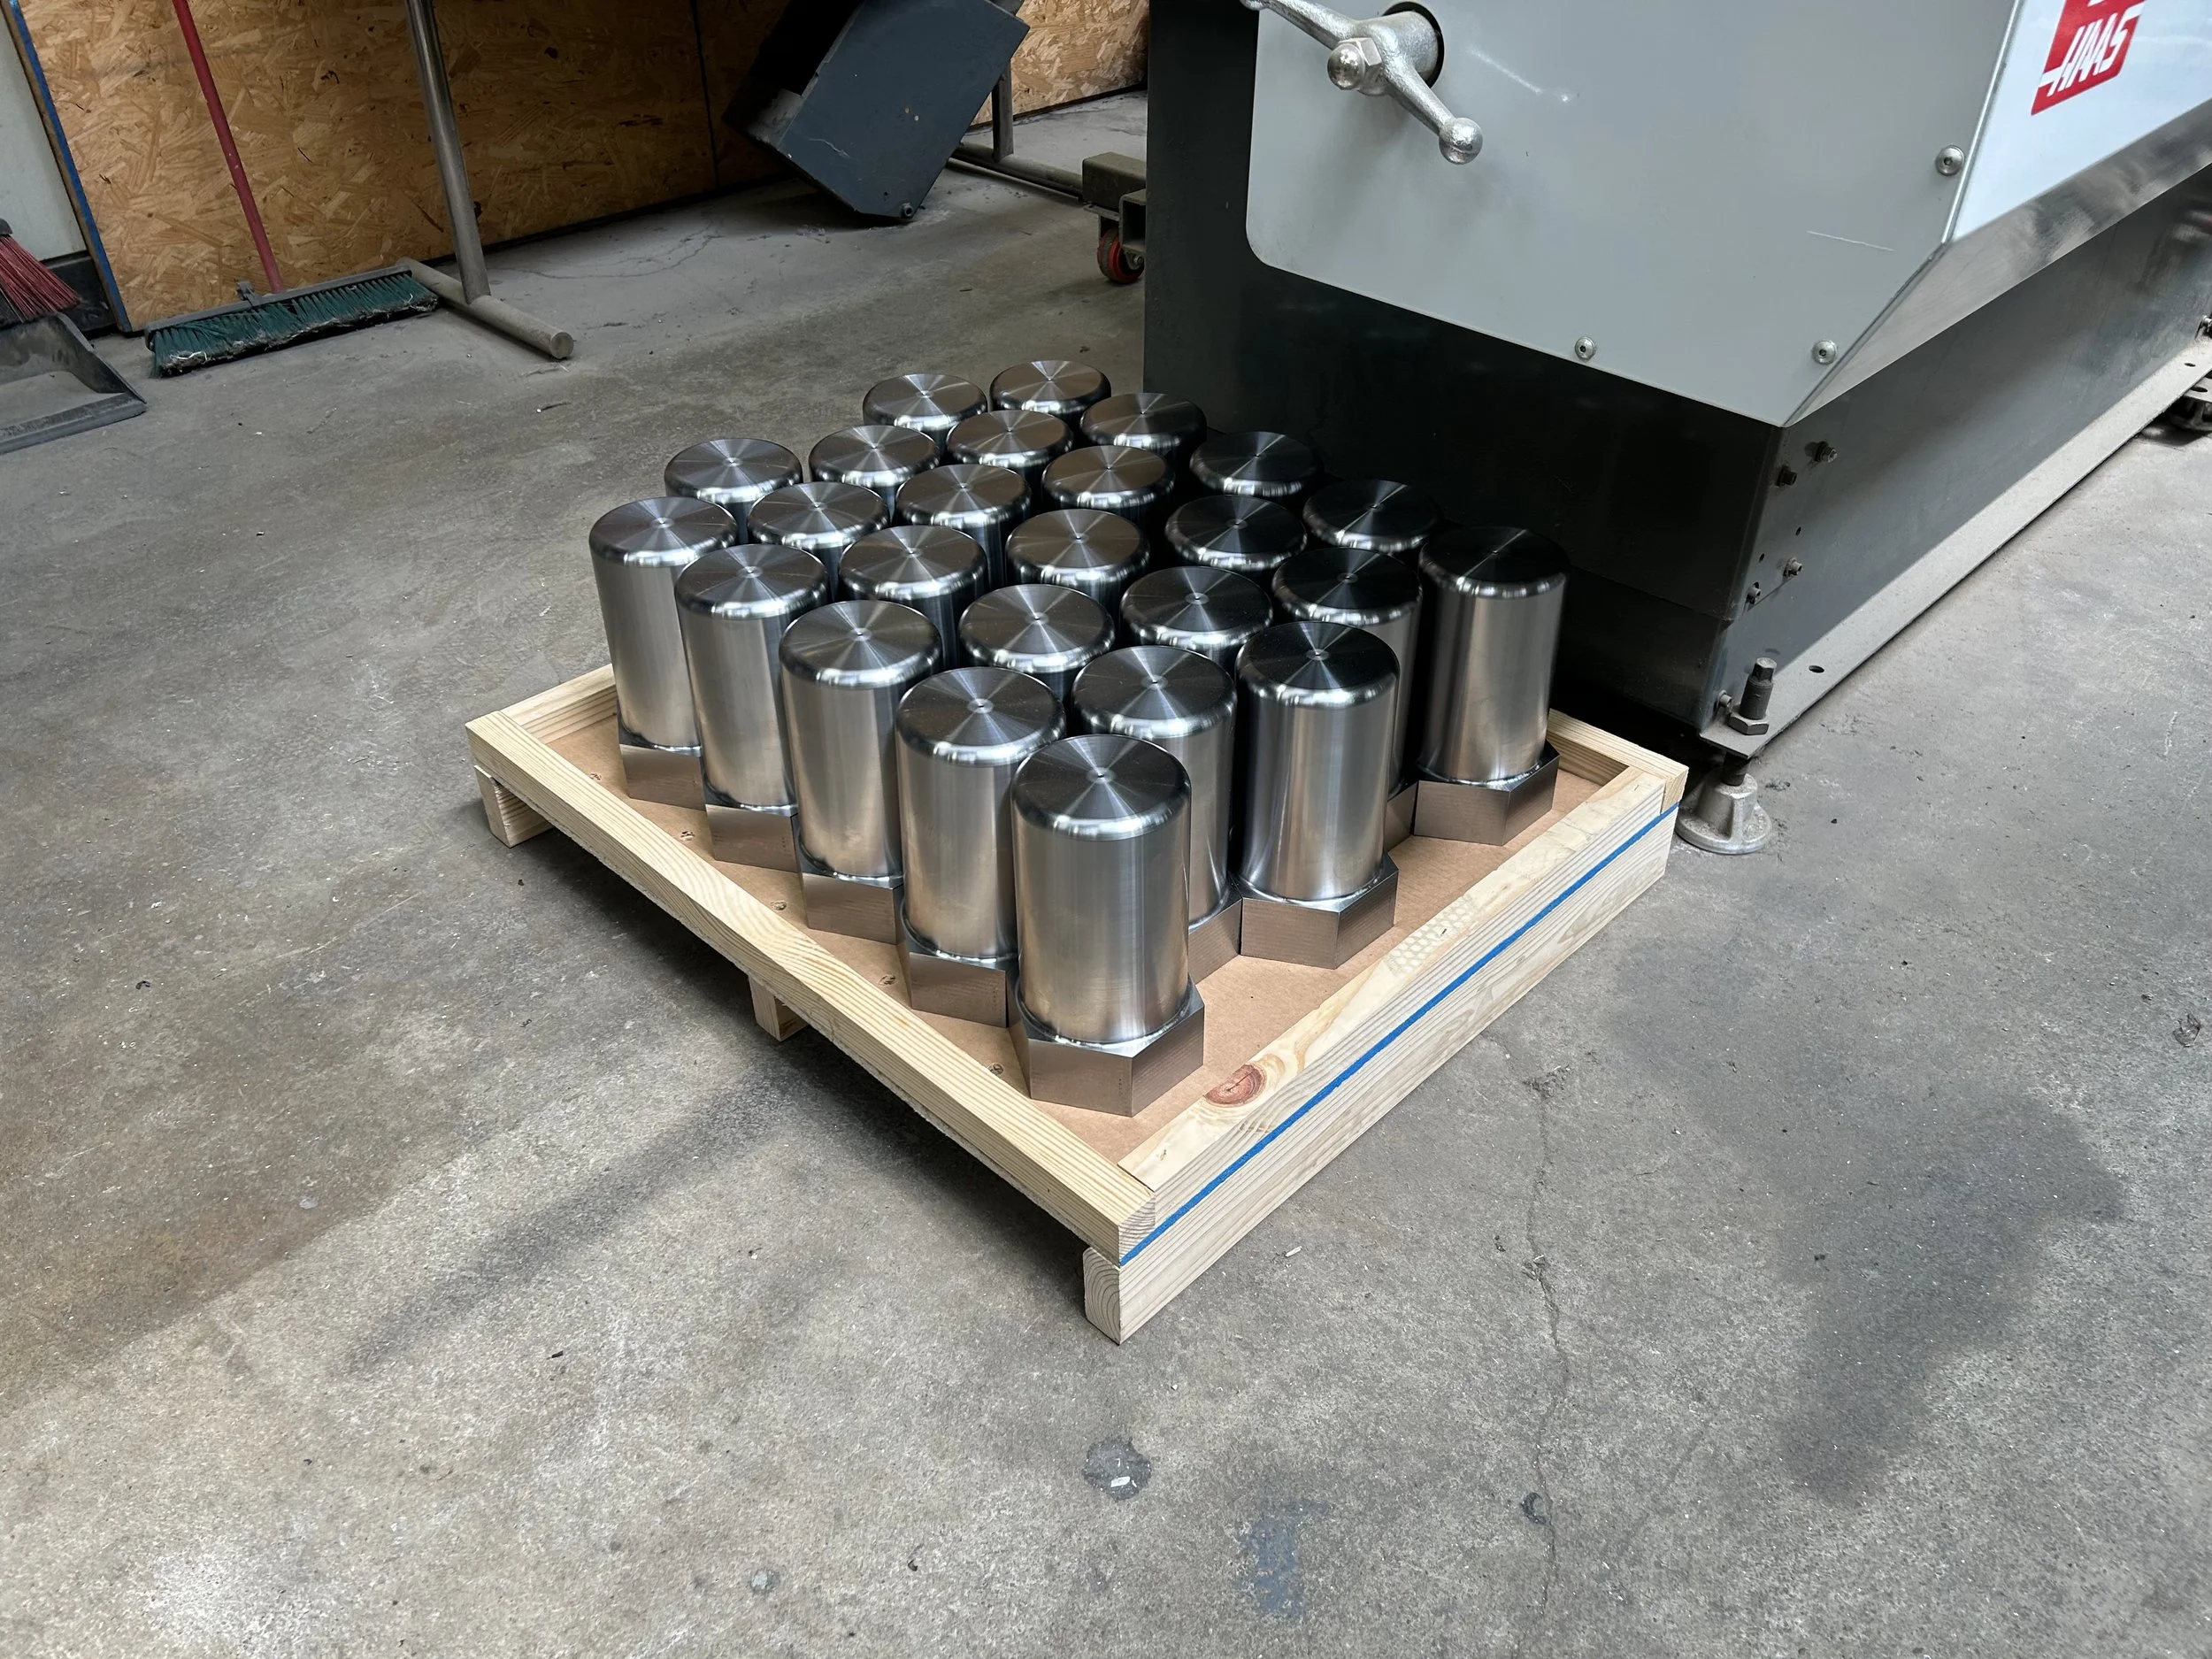
Palletized blanks.
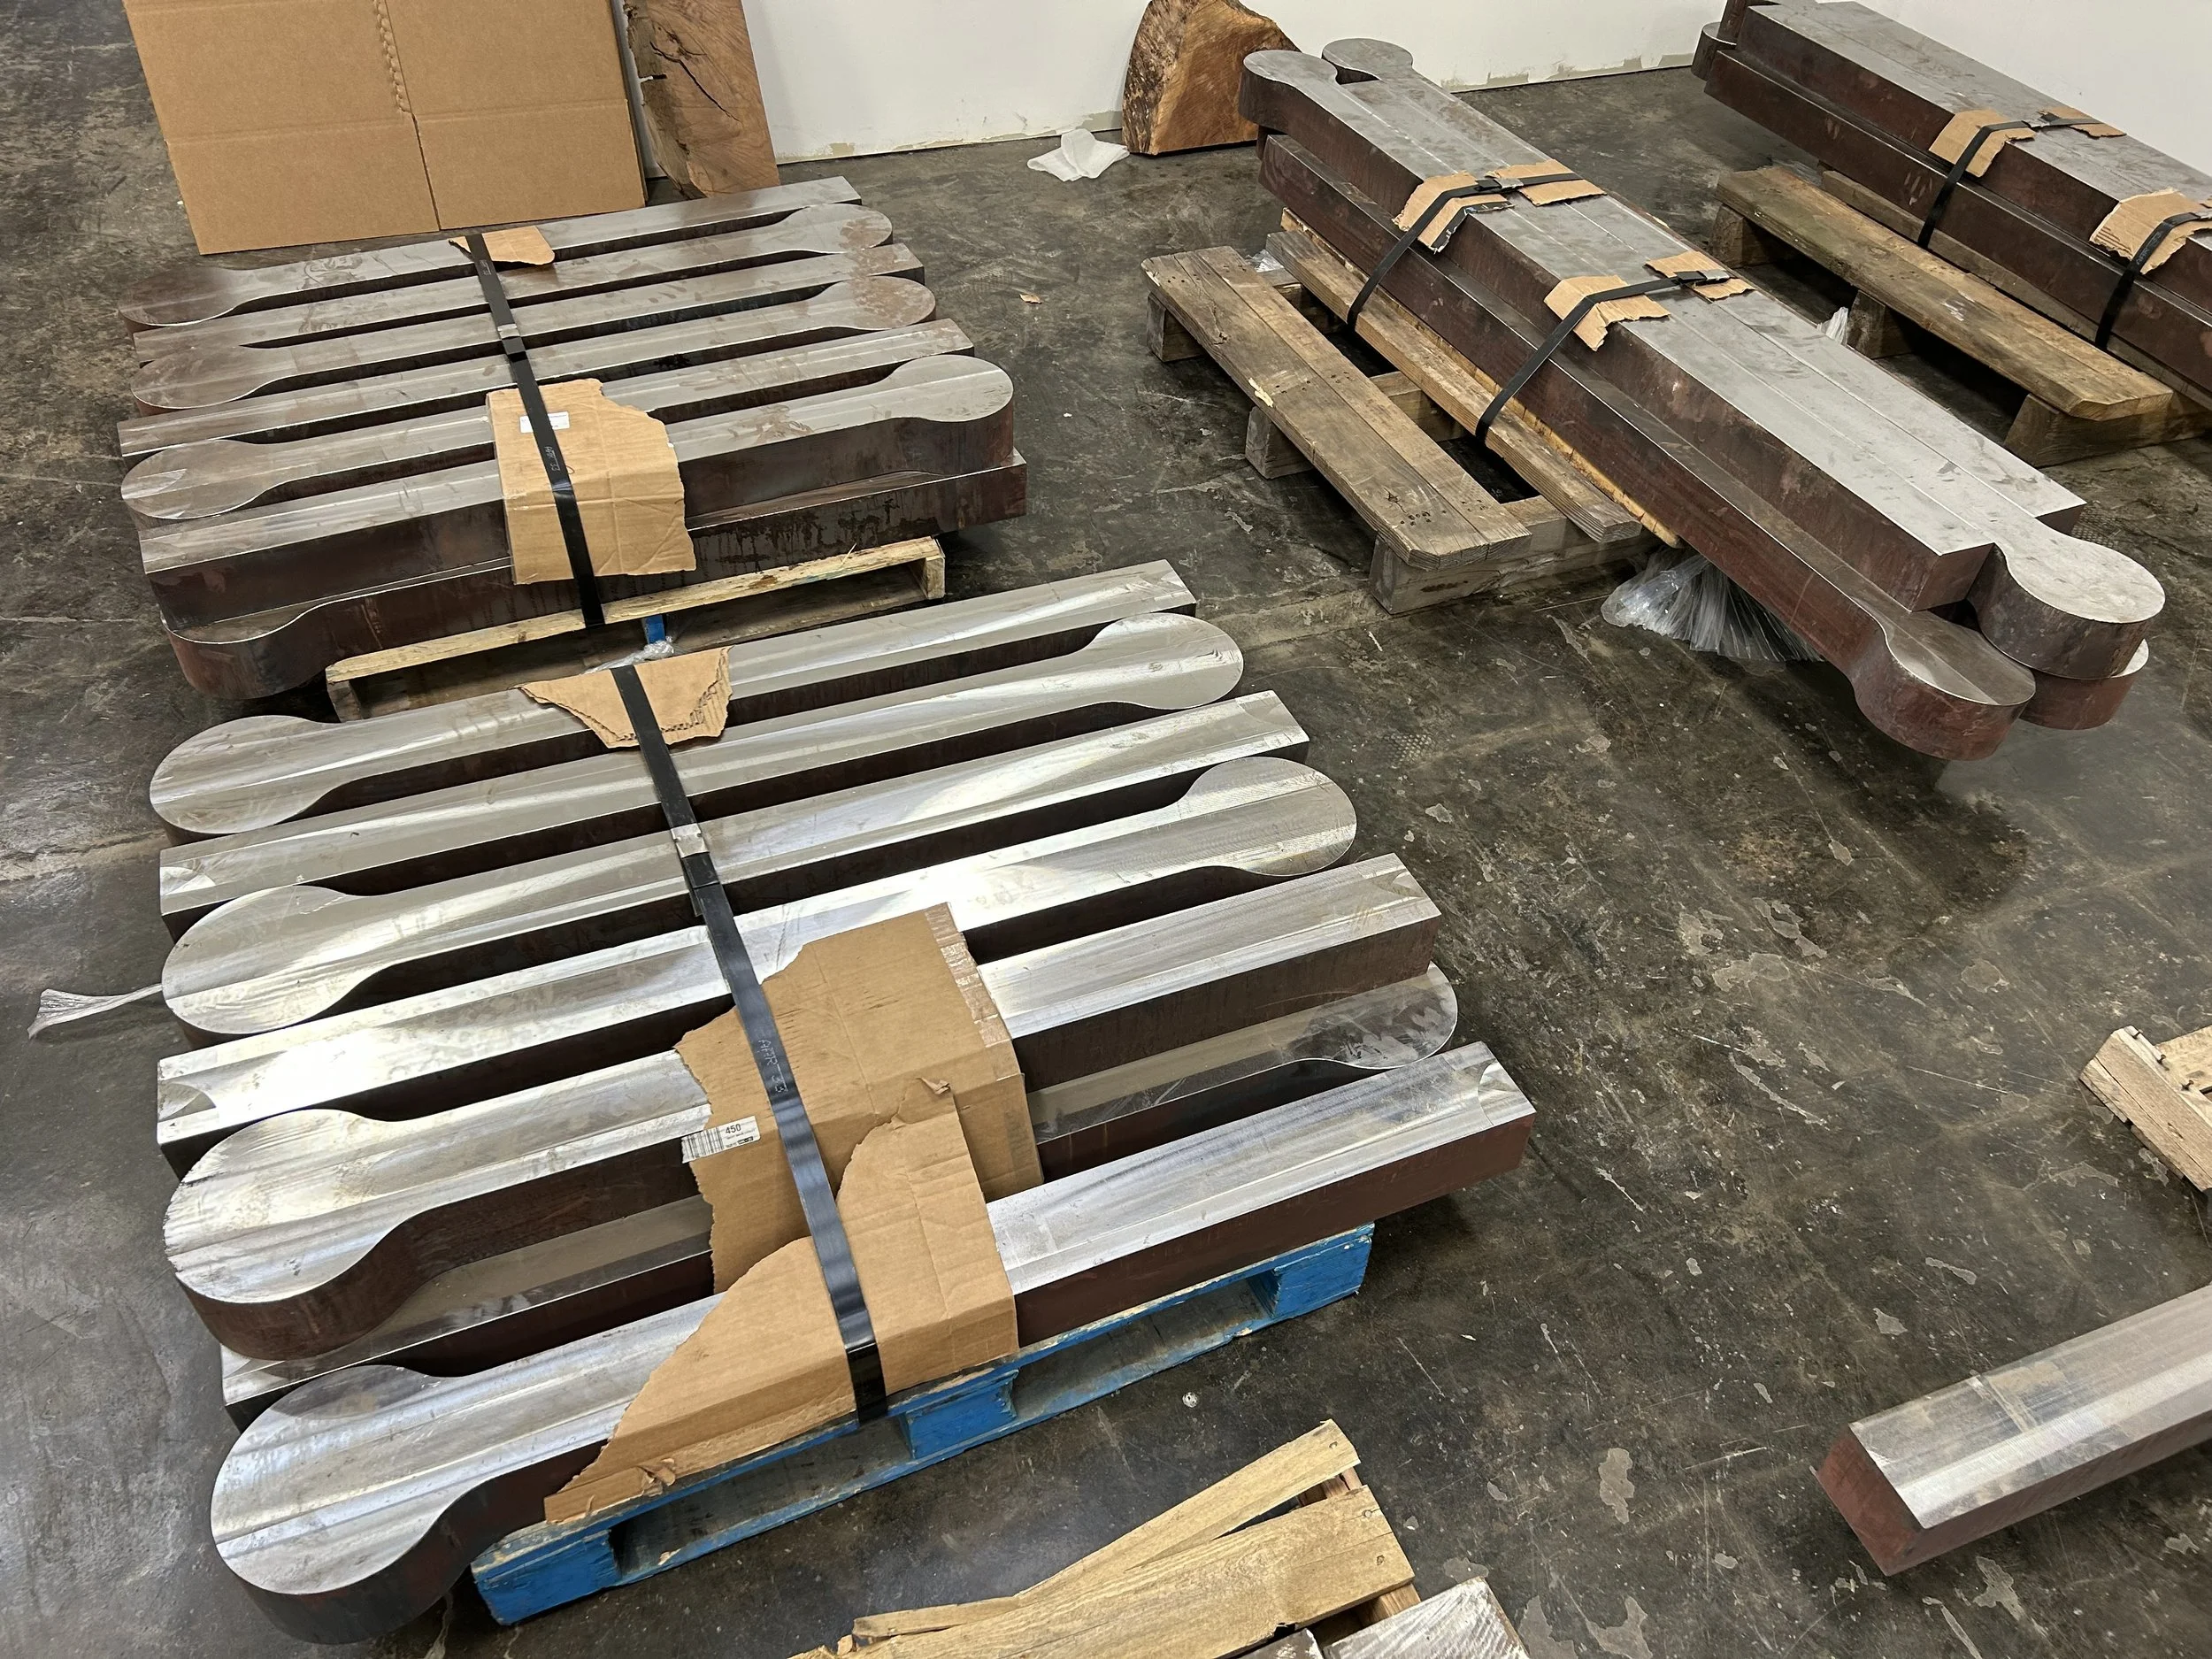
Blanks for the cap nuts and the main nuts.

Flame-cut and forged material involves a lot of stress. This shot shows the sub-plate fixture we used to hold the blanks in their "relaxed" or normalized state. This was our strategy instead of using vises to hold the blanks, which could have resulted in a spring-back effect. We have deep knowledge of materials and processes and knew we needed to avoid producing a part out of spec.

The fixture has slots for steel tabs, which we welded onto the bottom of the blanks. This was a low-profile attachment that will later be machined away in the third and fourth operations.

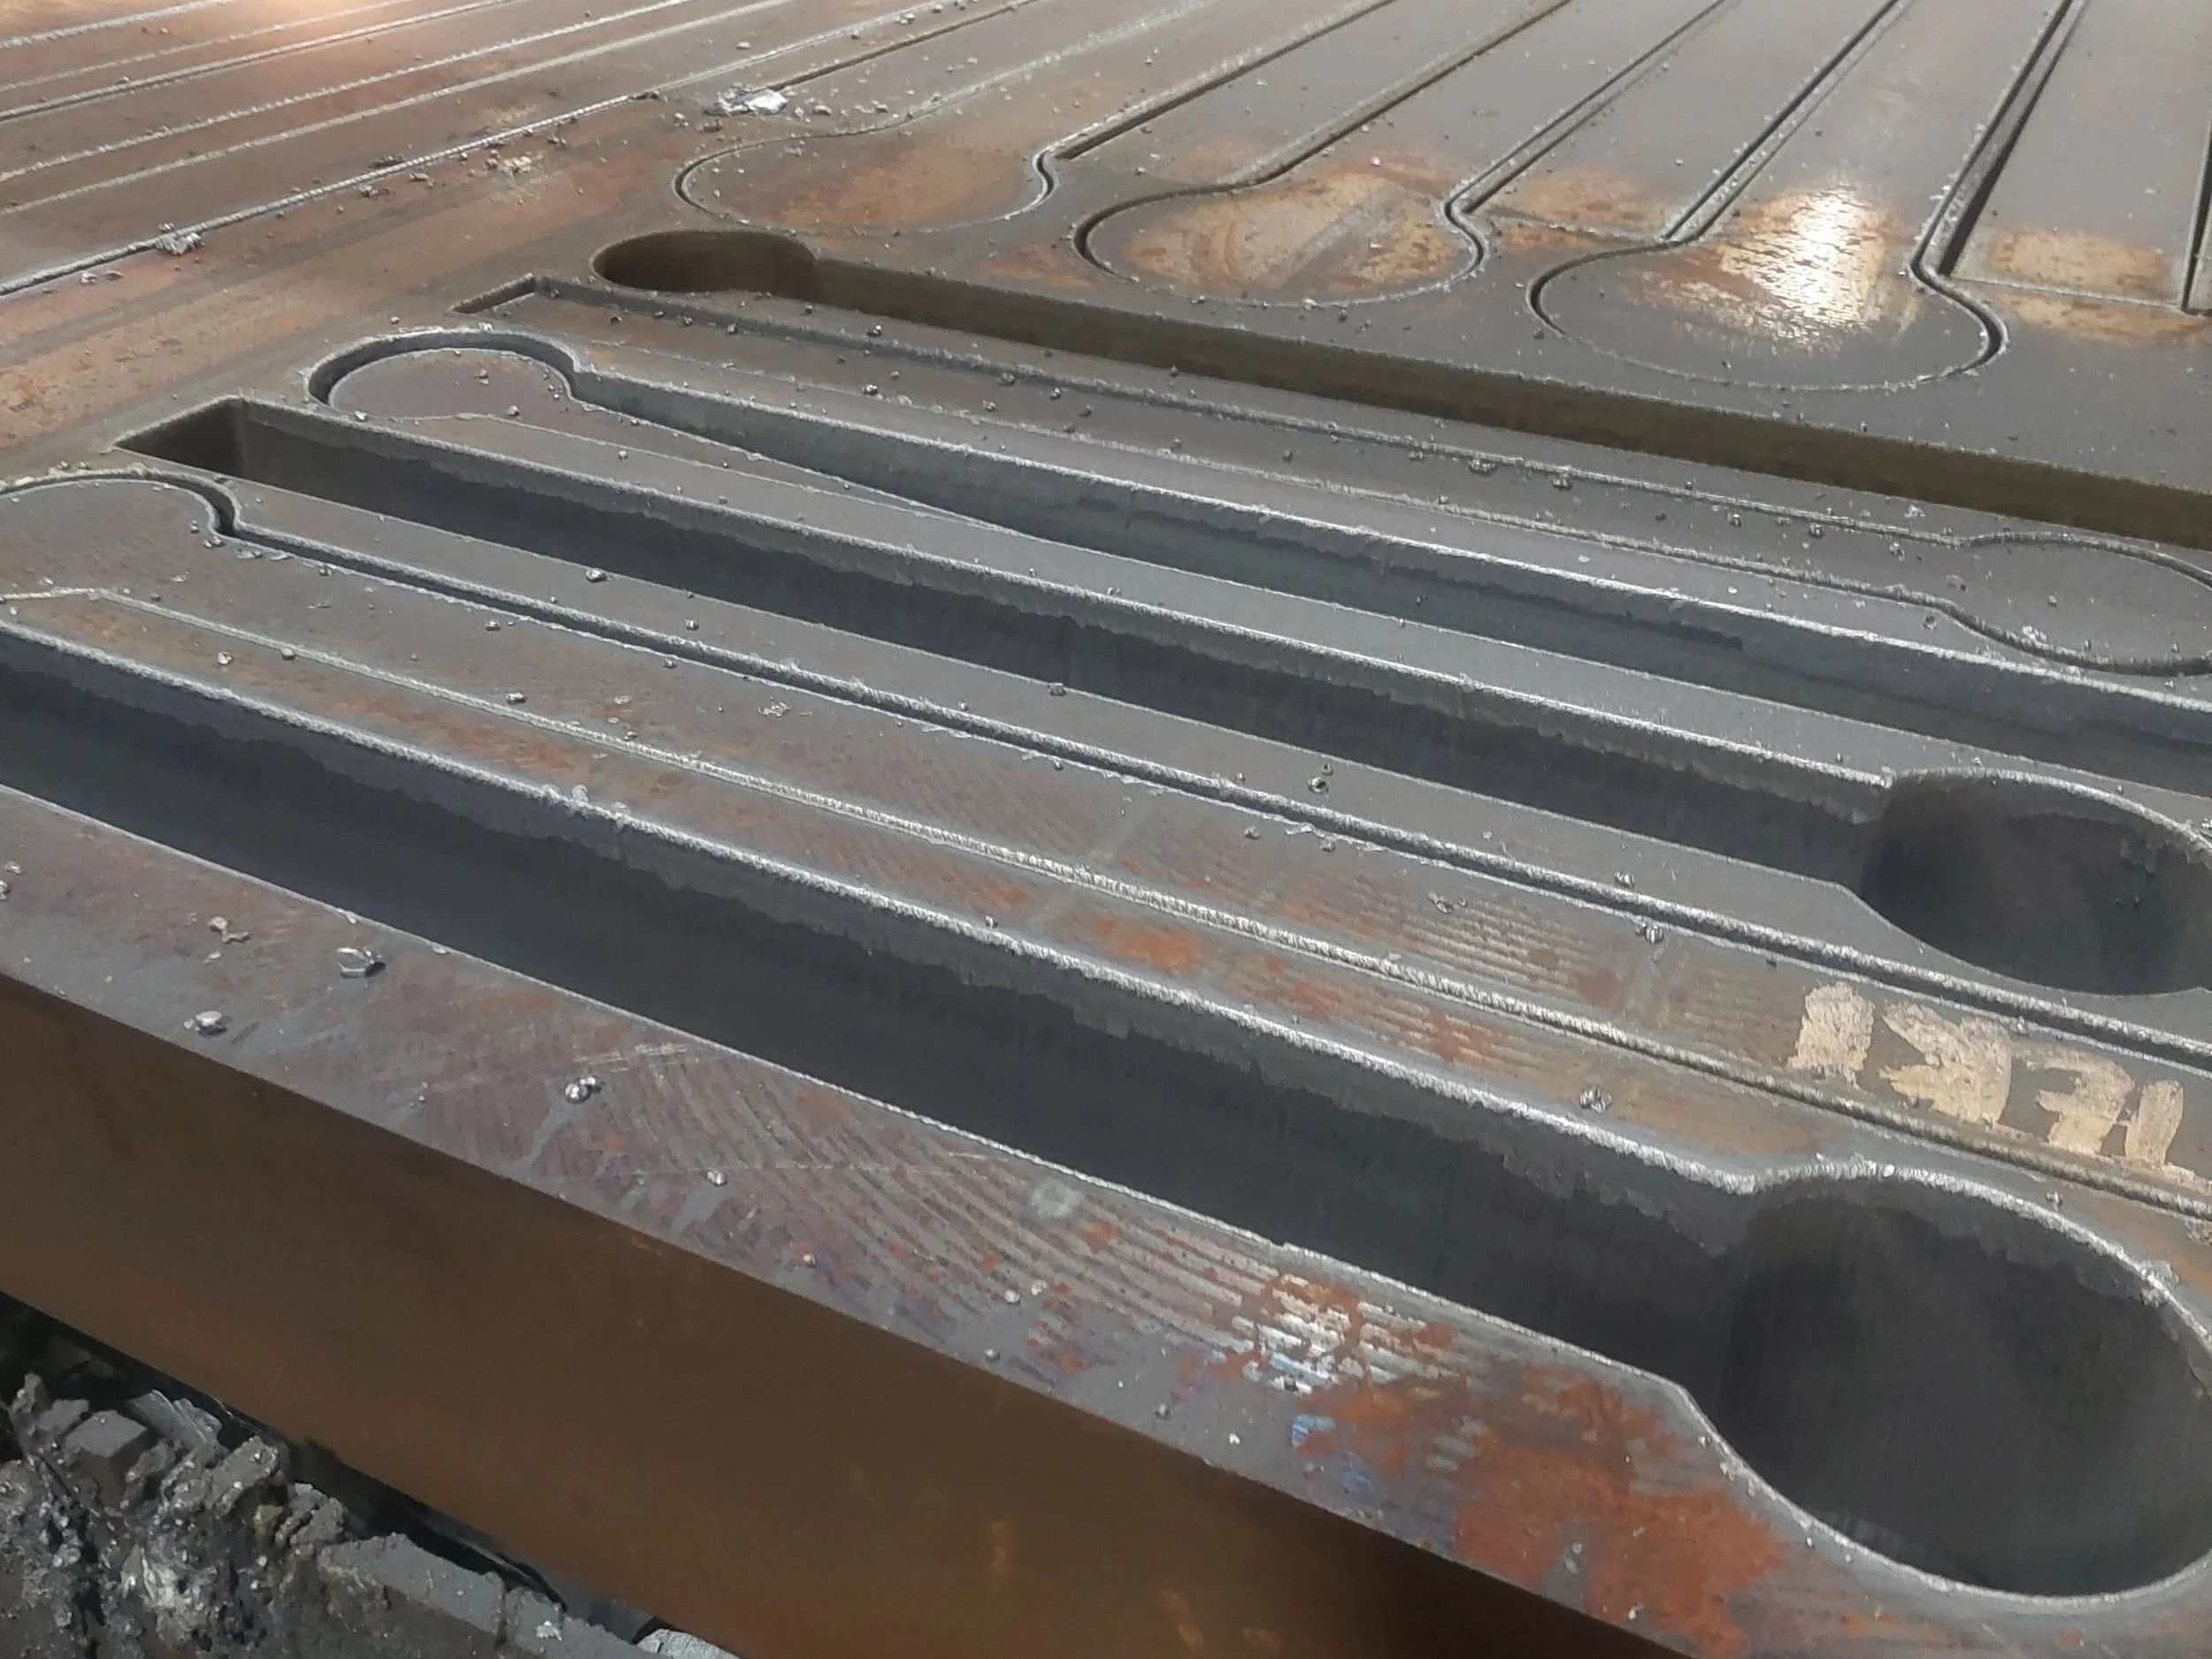
One of the take-up blanks set up in our Haas vertical milling machine. You can see that we machine down to about 3/8 of an inch of the t-slot table, leaving the welds intact. The sub-plate fixture allowed us to accurately shift the 190 lb and 330 lb take-ups on our Haas VF-5 SS t-slot table so that we could easily and accurately machine the full length of the parts.
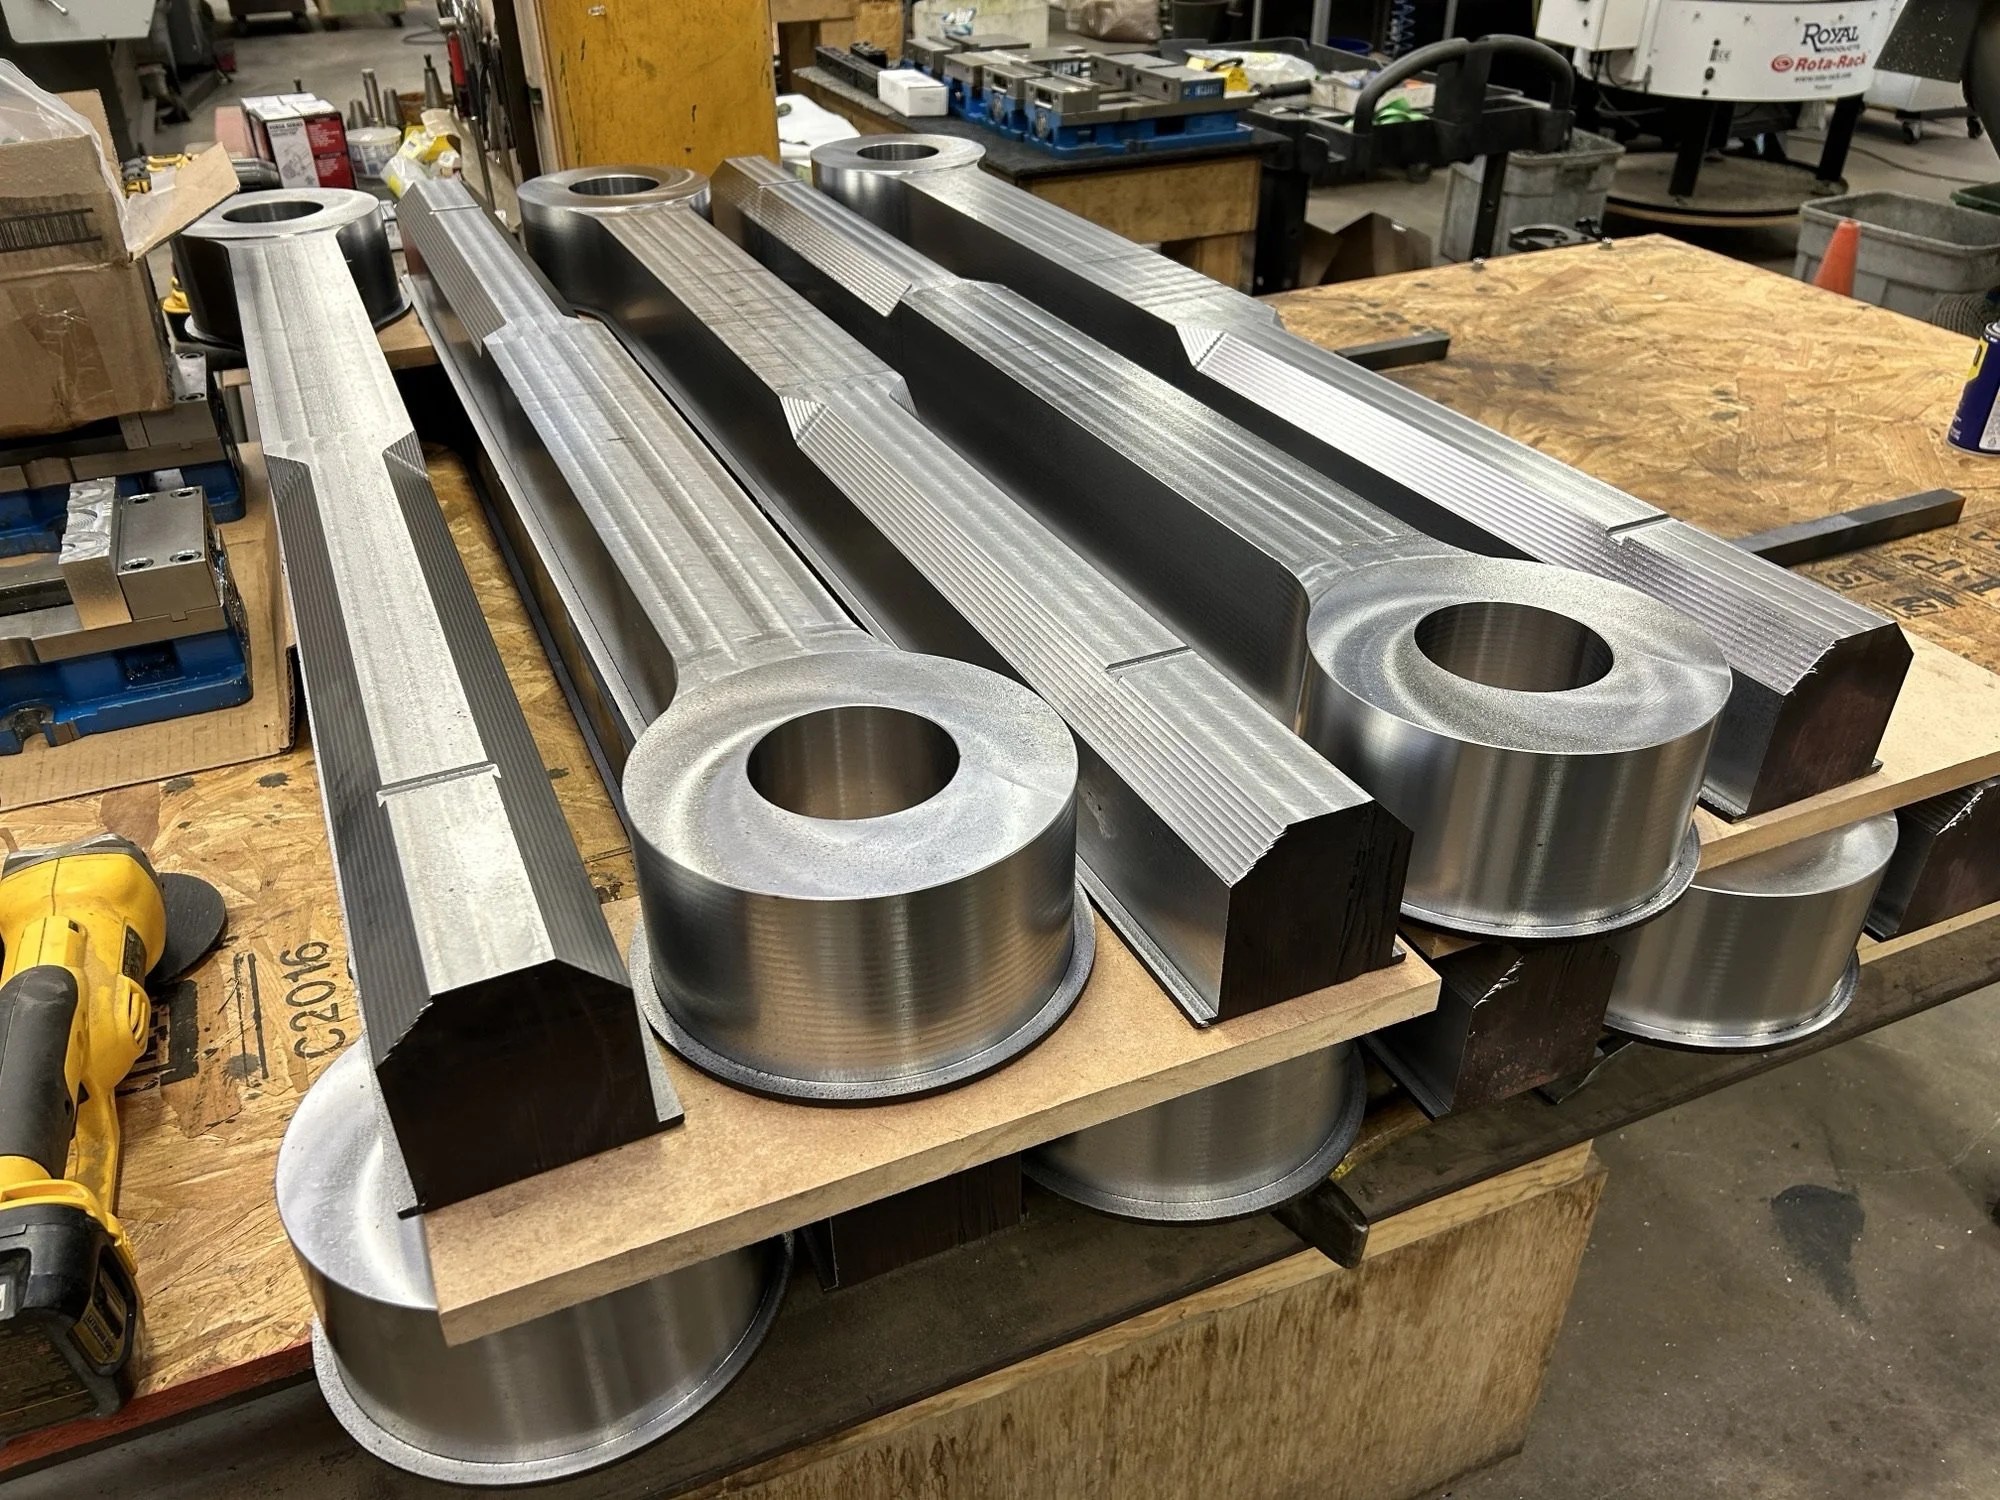
What the parts looked like after the first and second operations. The corners of the bolt blanks were machined down to reduce the challenge of turning the 3 3/4 inch acme thread and the slot on the top was a reference for the overall length of the bolt, allowing us to leave the extra material to hold onto in the turning operation. You can see the 3/8 inch flange at the bottom of the part. This is machined away in the third and fourth operations.

The third operation: this resulted in the net finished geometry for both the top and the bottom of the eyebolt.

The fourth operation being set up: the hole in the center, to the left of the mallet, is a reference hole for setting up the program to machine the fourth operation starting from the correct position after we have repositioned the part in the vises.

The blank is now ready for the last operation before turning the threads.

The eyebolts required a 9/16 inch diameter bolt hole to be drilled through the 8 inch diameter head. This operation was done in our Haas VF-2SS.

The hole needed to go through the head of the eyebolt at a 45 degree angle, so we designed a specialized fixture that supported the 200 lbs blank. This setup allowed us to accurately and repeatedly drill through all 50 eyebolts.
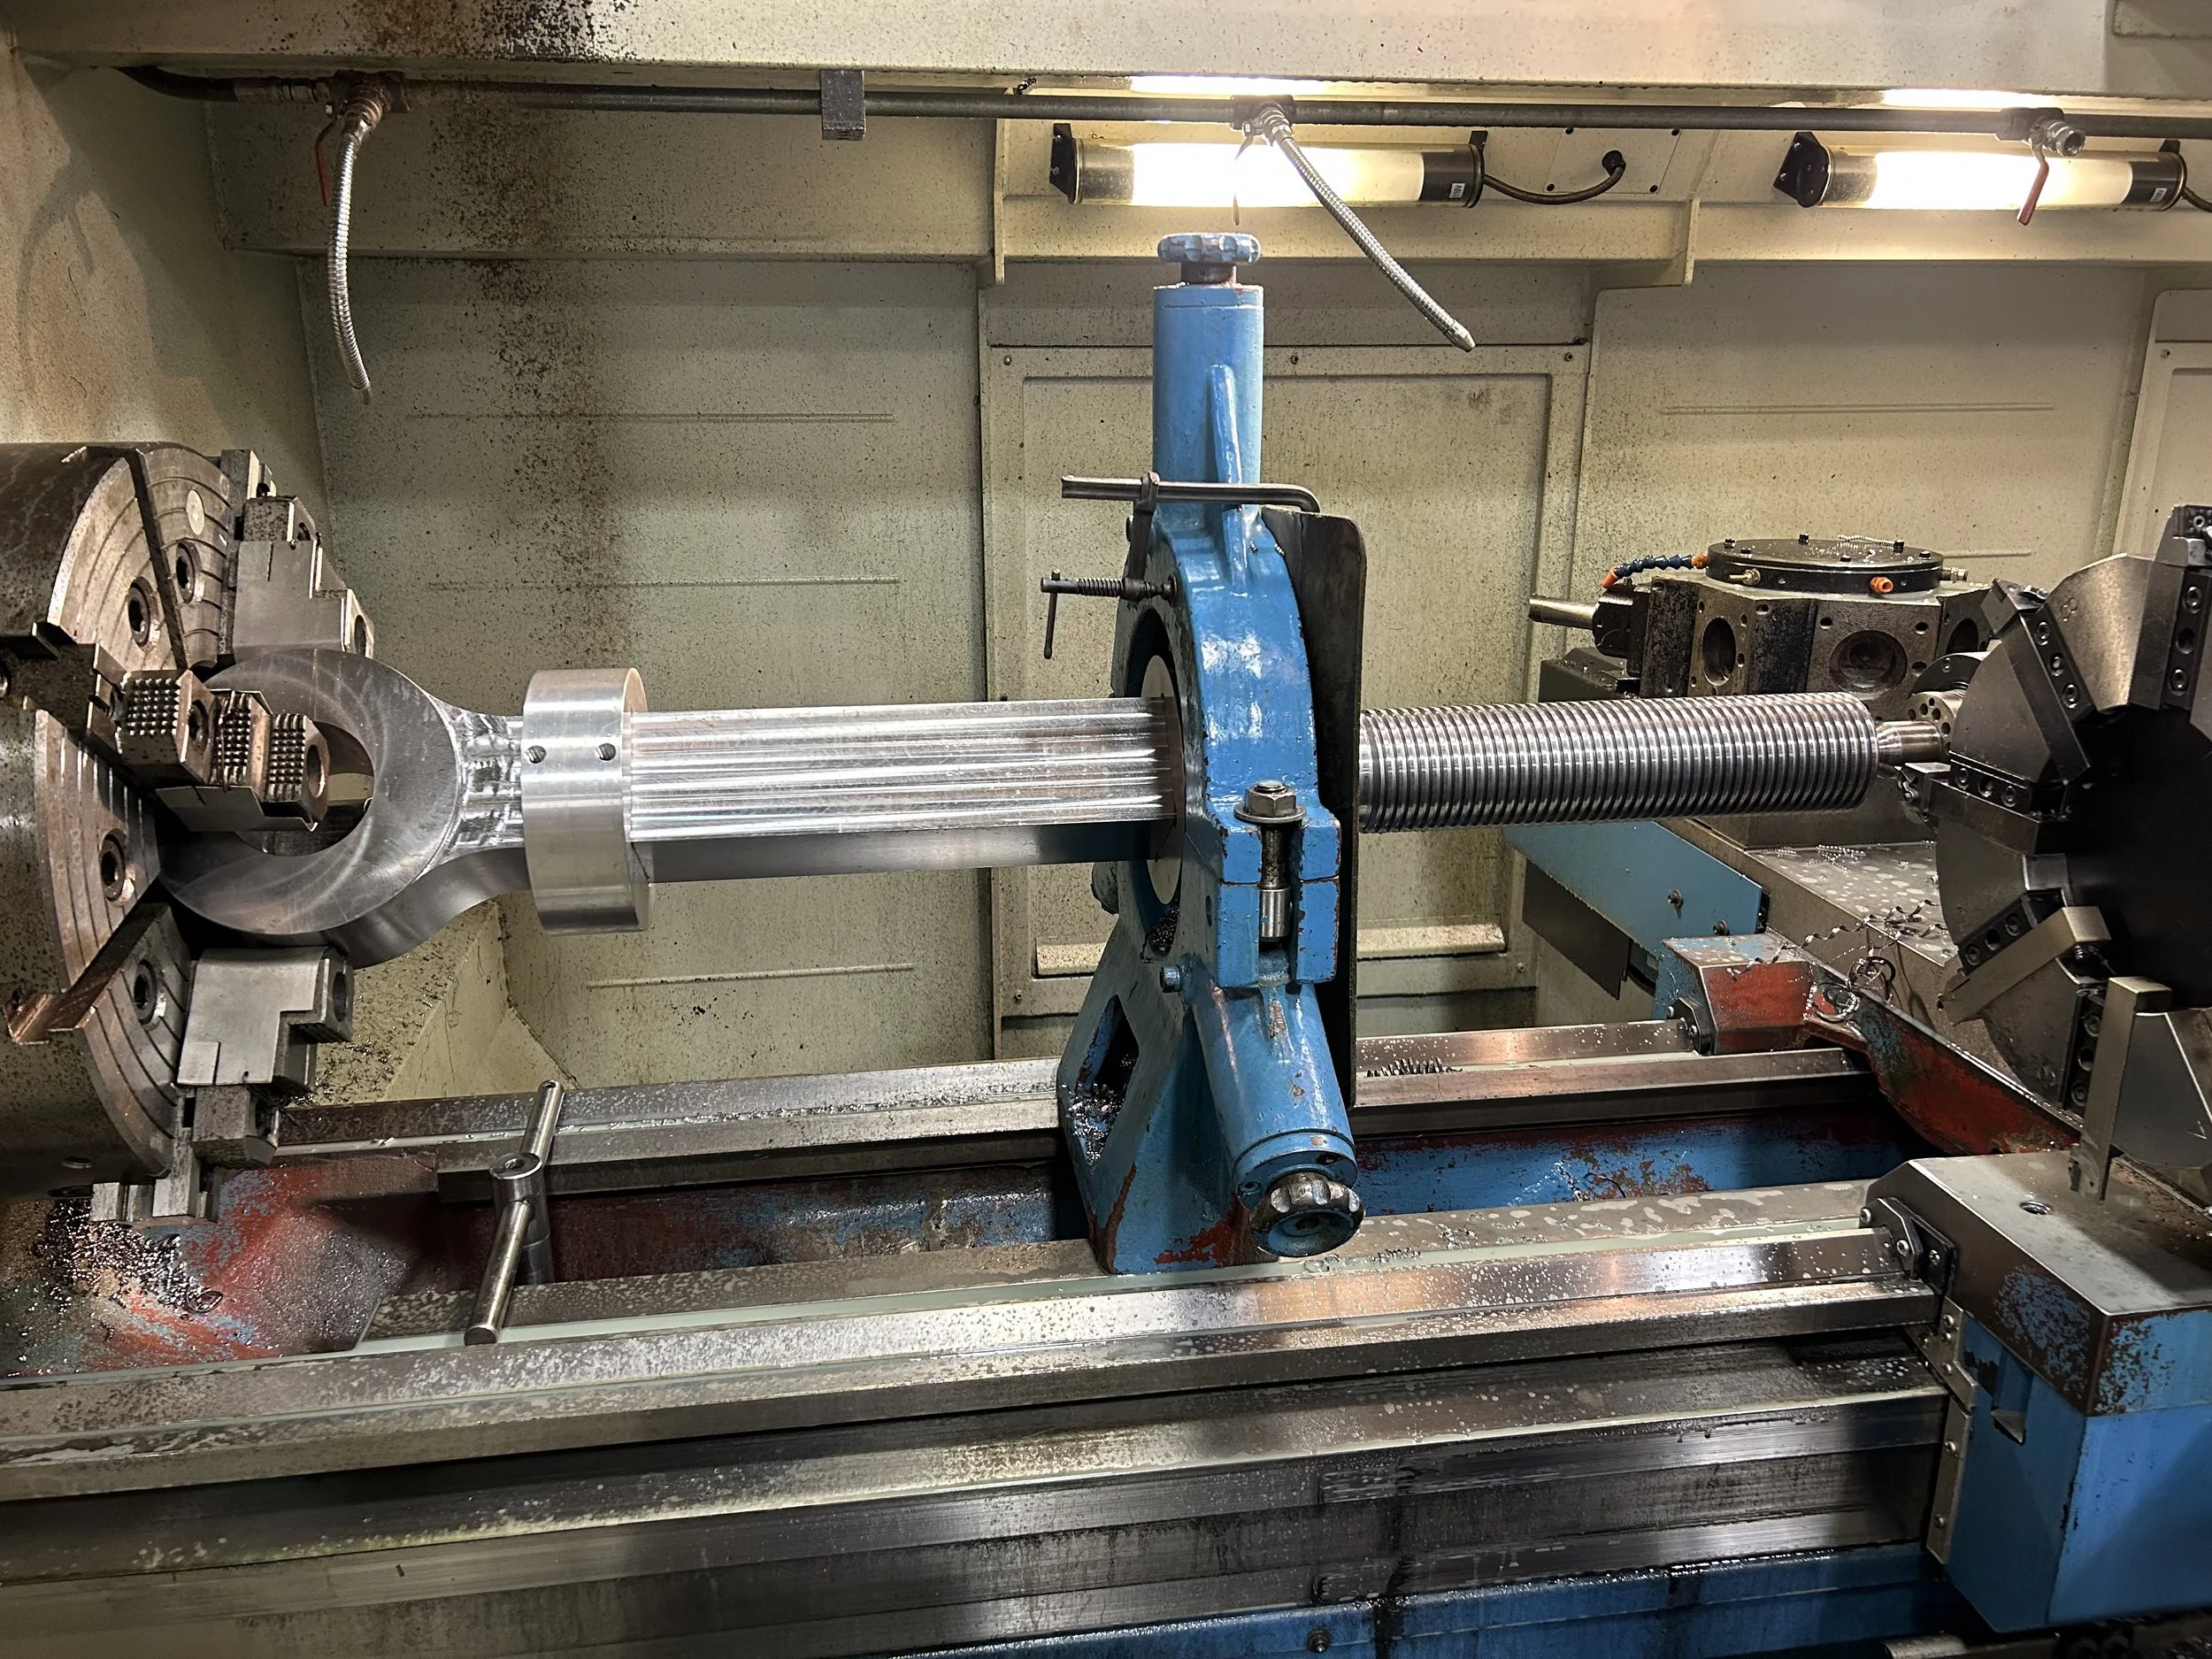
The last step was to turn the 3 3/4 inch acme threads onto the ends of the eyebolts.
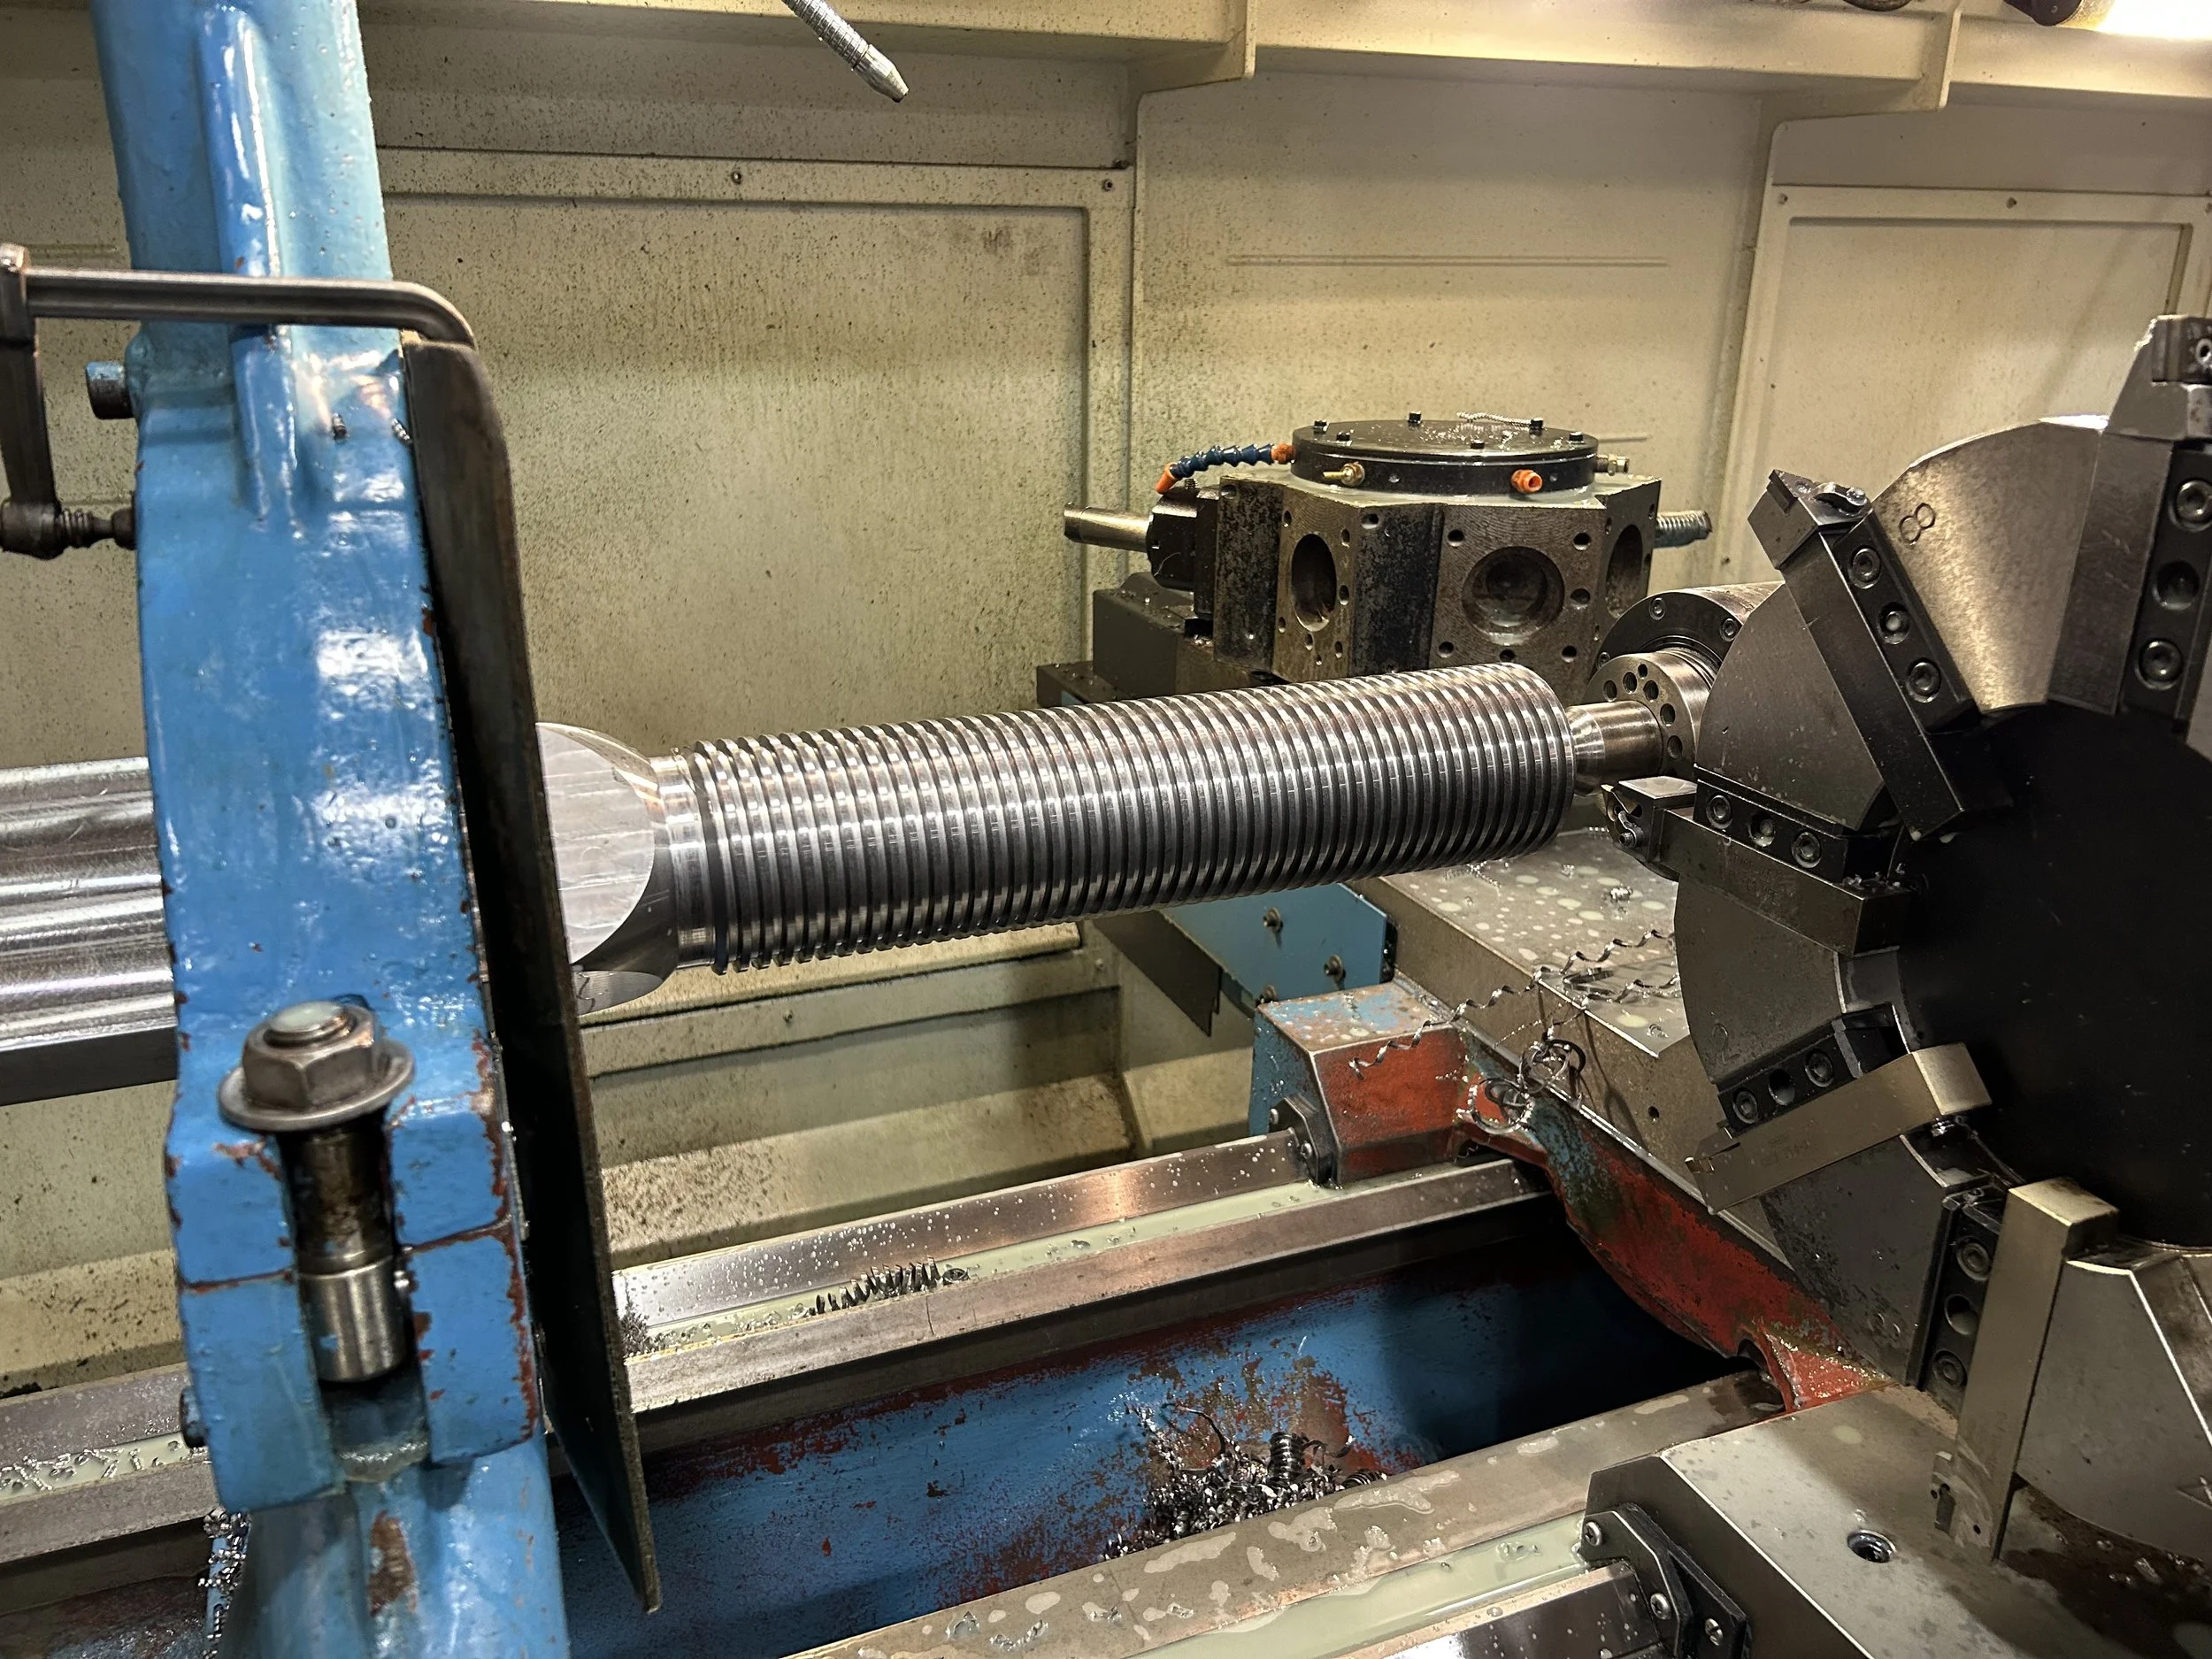
Thread cutting in a CNC lathe.

Both the nuts and the cap nuts started out as the same material as the eyebolts.

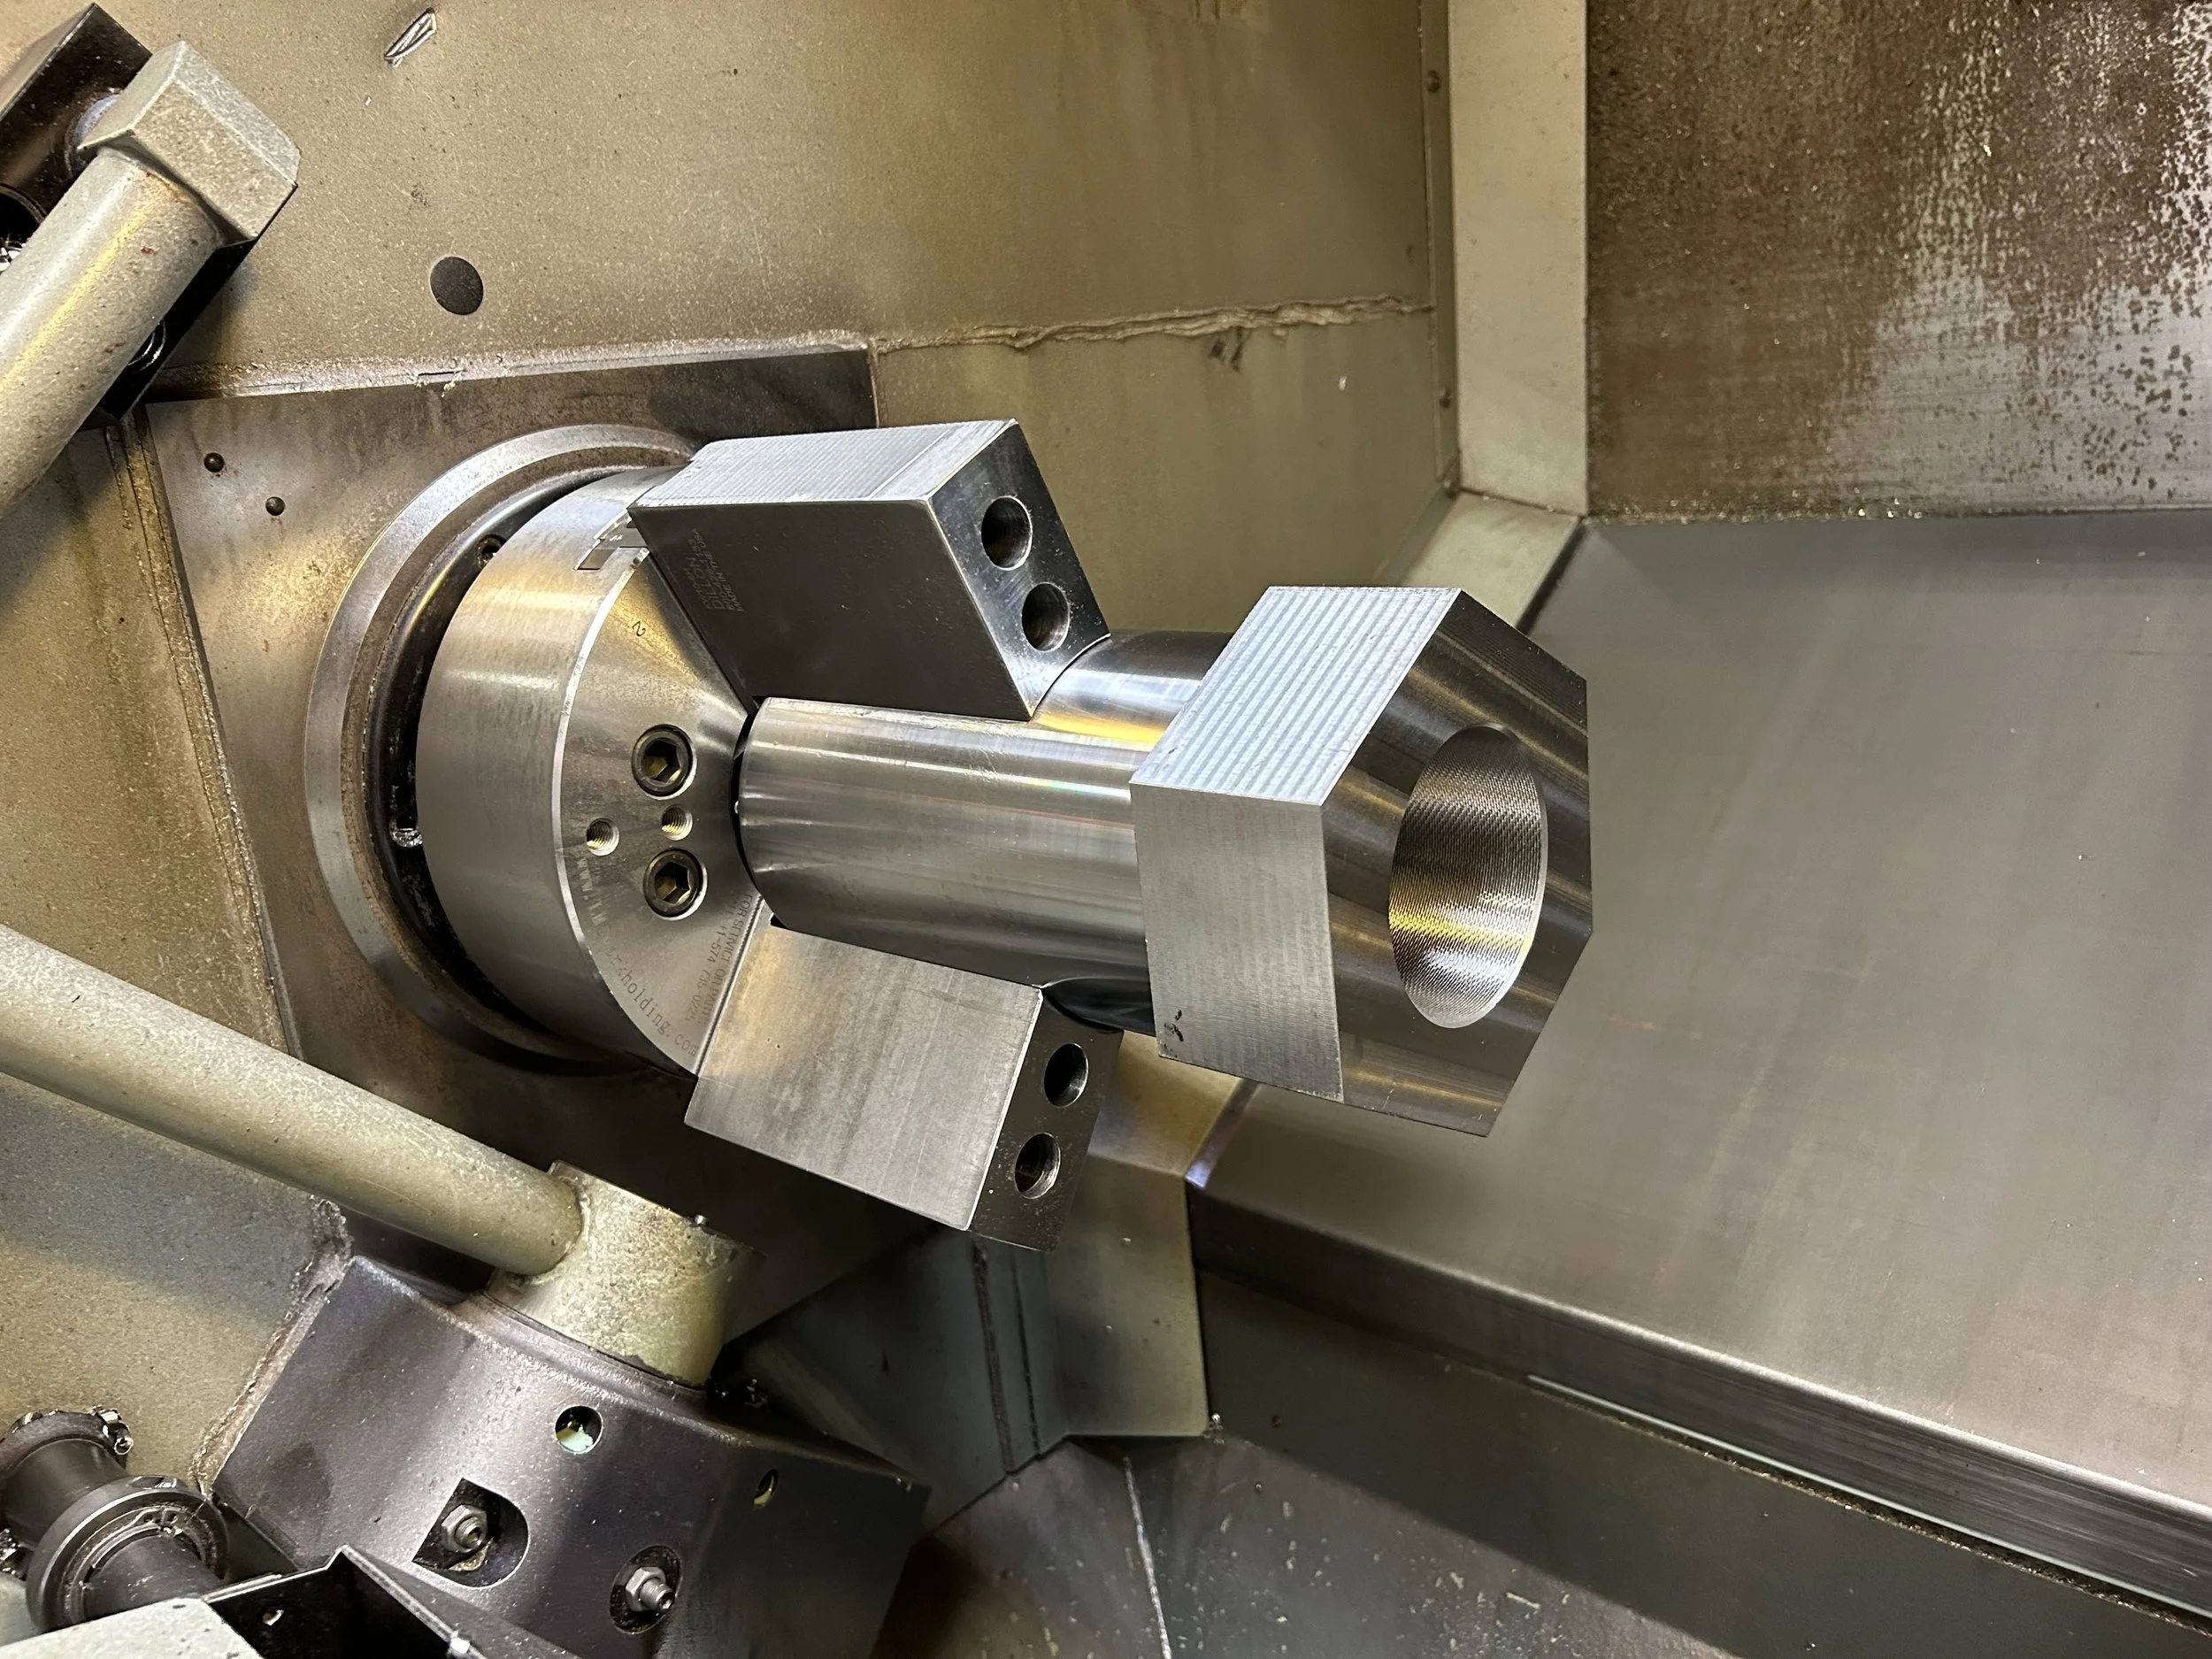
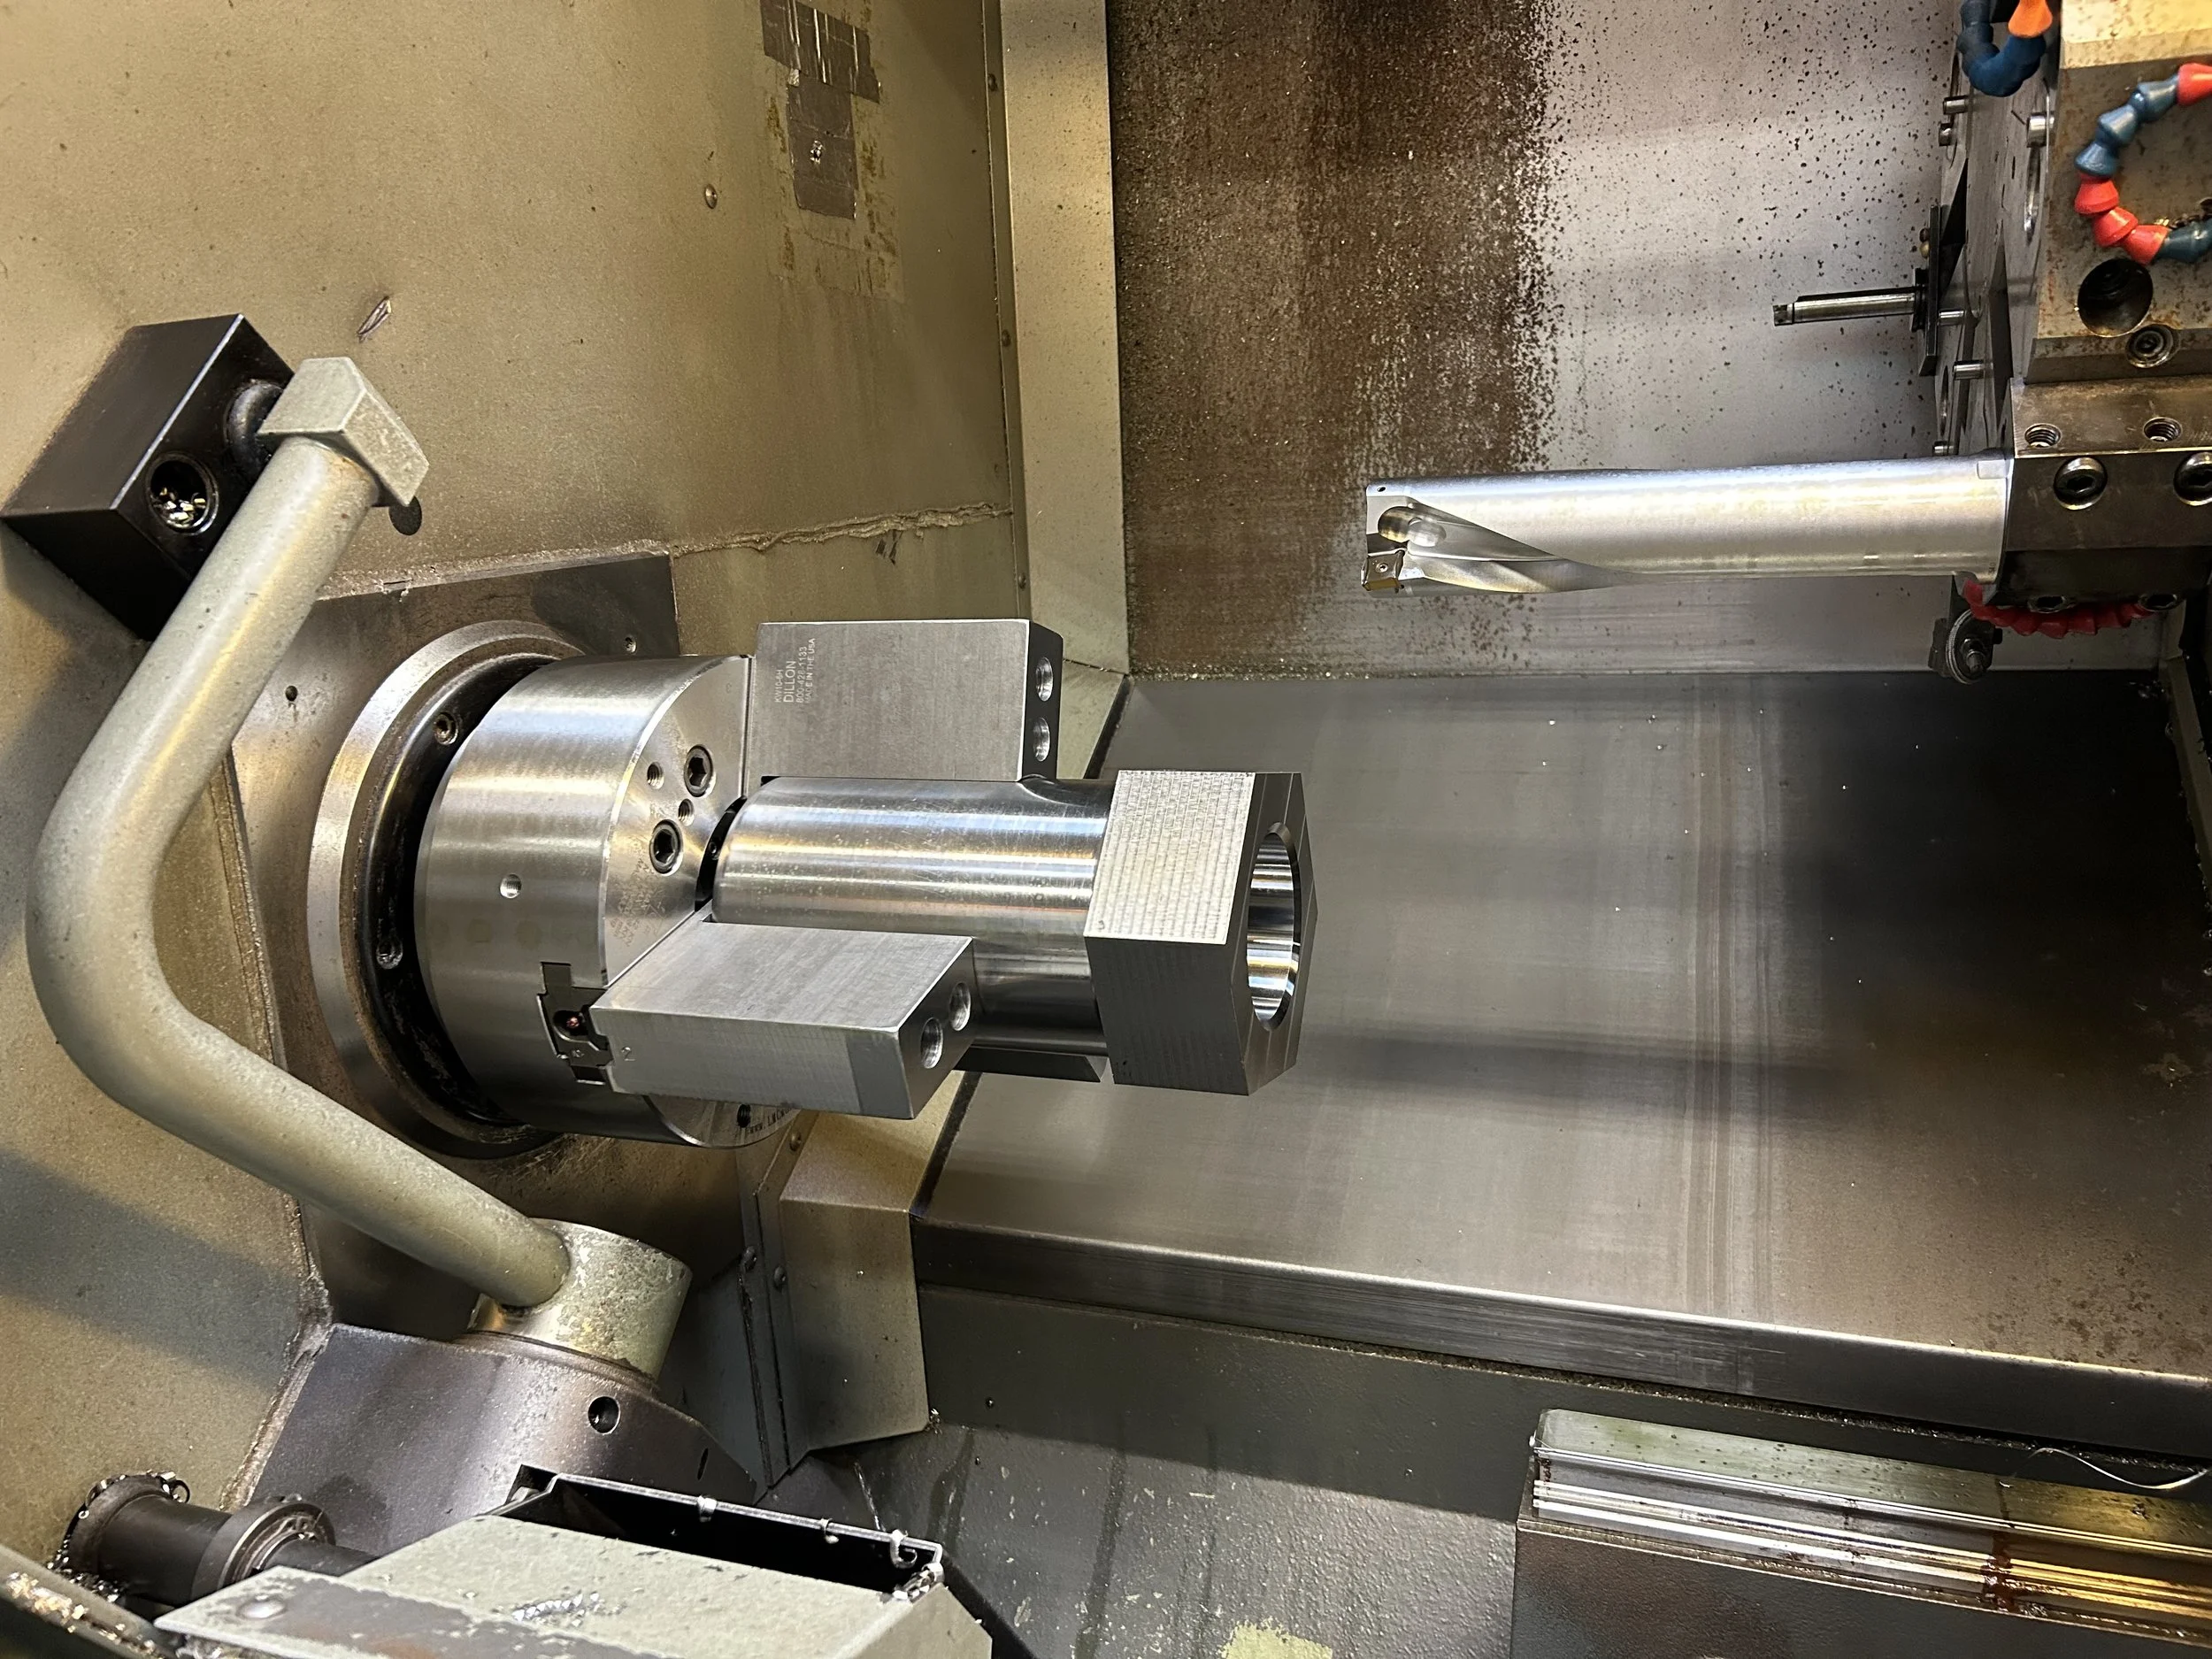
The blanks were rough flame-cut blocks. We machined the hex shape on one end. We would turn the cylinder side in our CNC lathe for the rest of the operations.
Blanks, ready to go into our CNC turning center.

This operation in the CNC lathe turned the outer shape of the top of the cap nut and all of the materials on the inside, leaving only the threading to complete. Thread milling was a more reliable strategy than turning, because of the challenges related to intense tool pressure with this material and the size of the threads.
Here's the setup for all the internal turning, as seen in our Haas ST-30Y lathe.
Shown here is the 2 1/2 inch diameter inserted drill, which did the bulk of the interior material removal before boring.
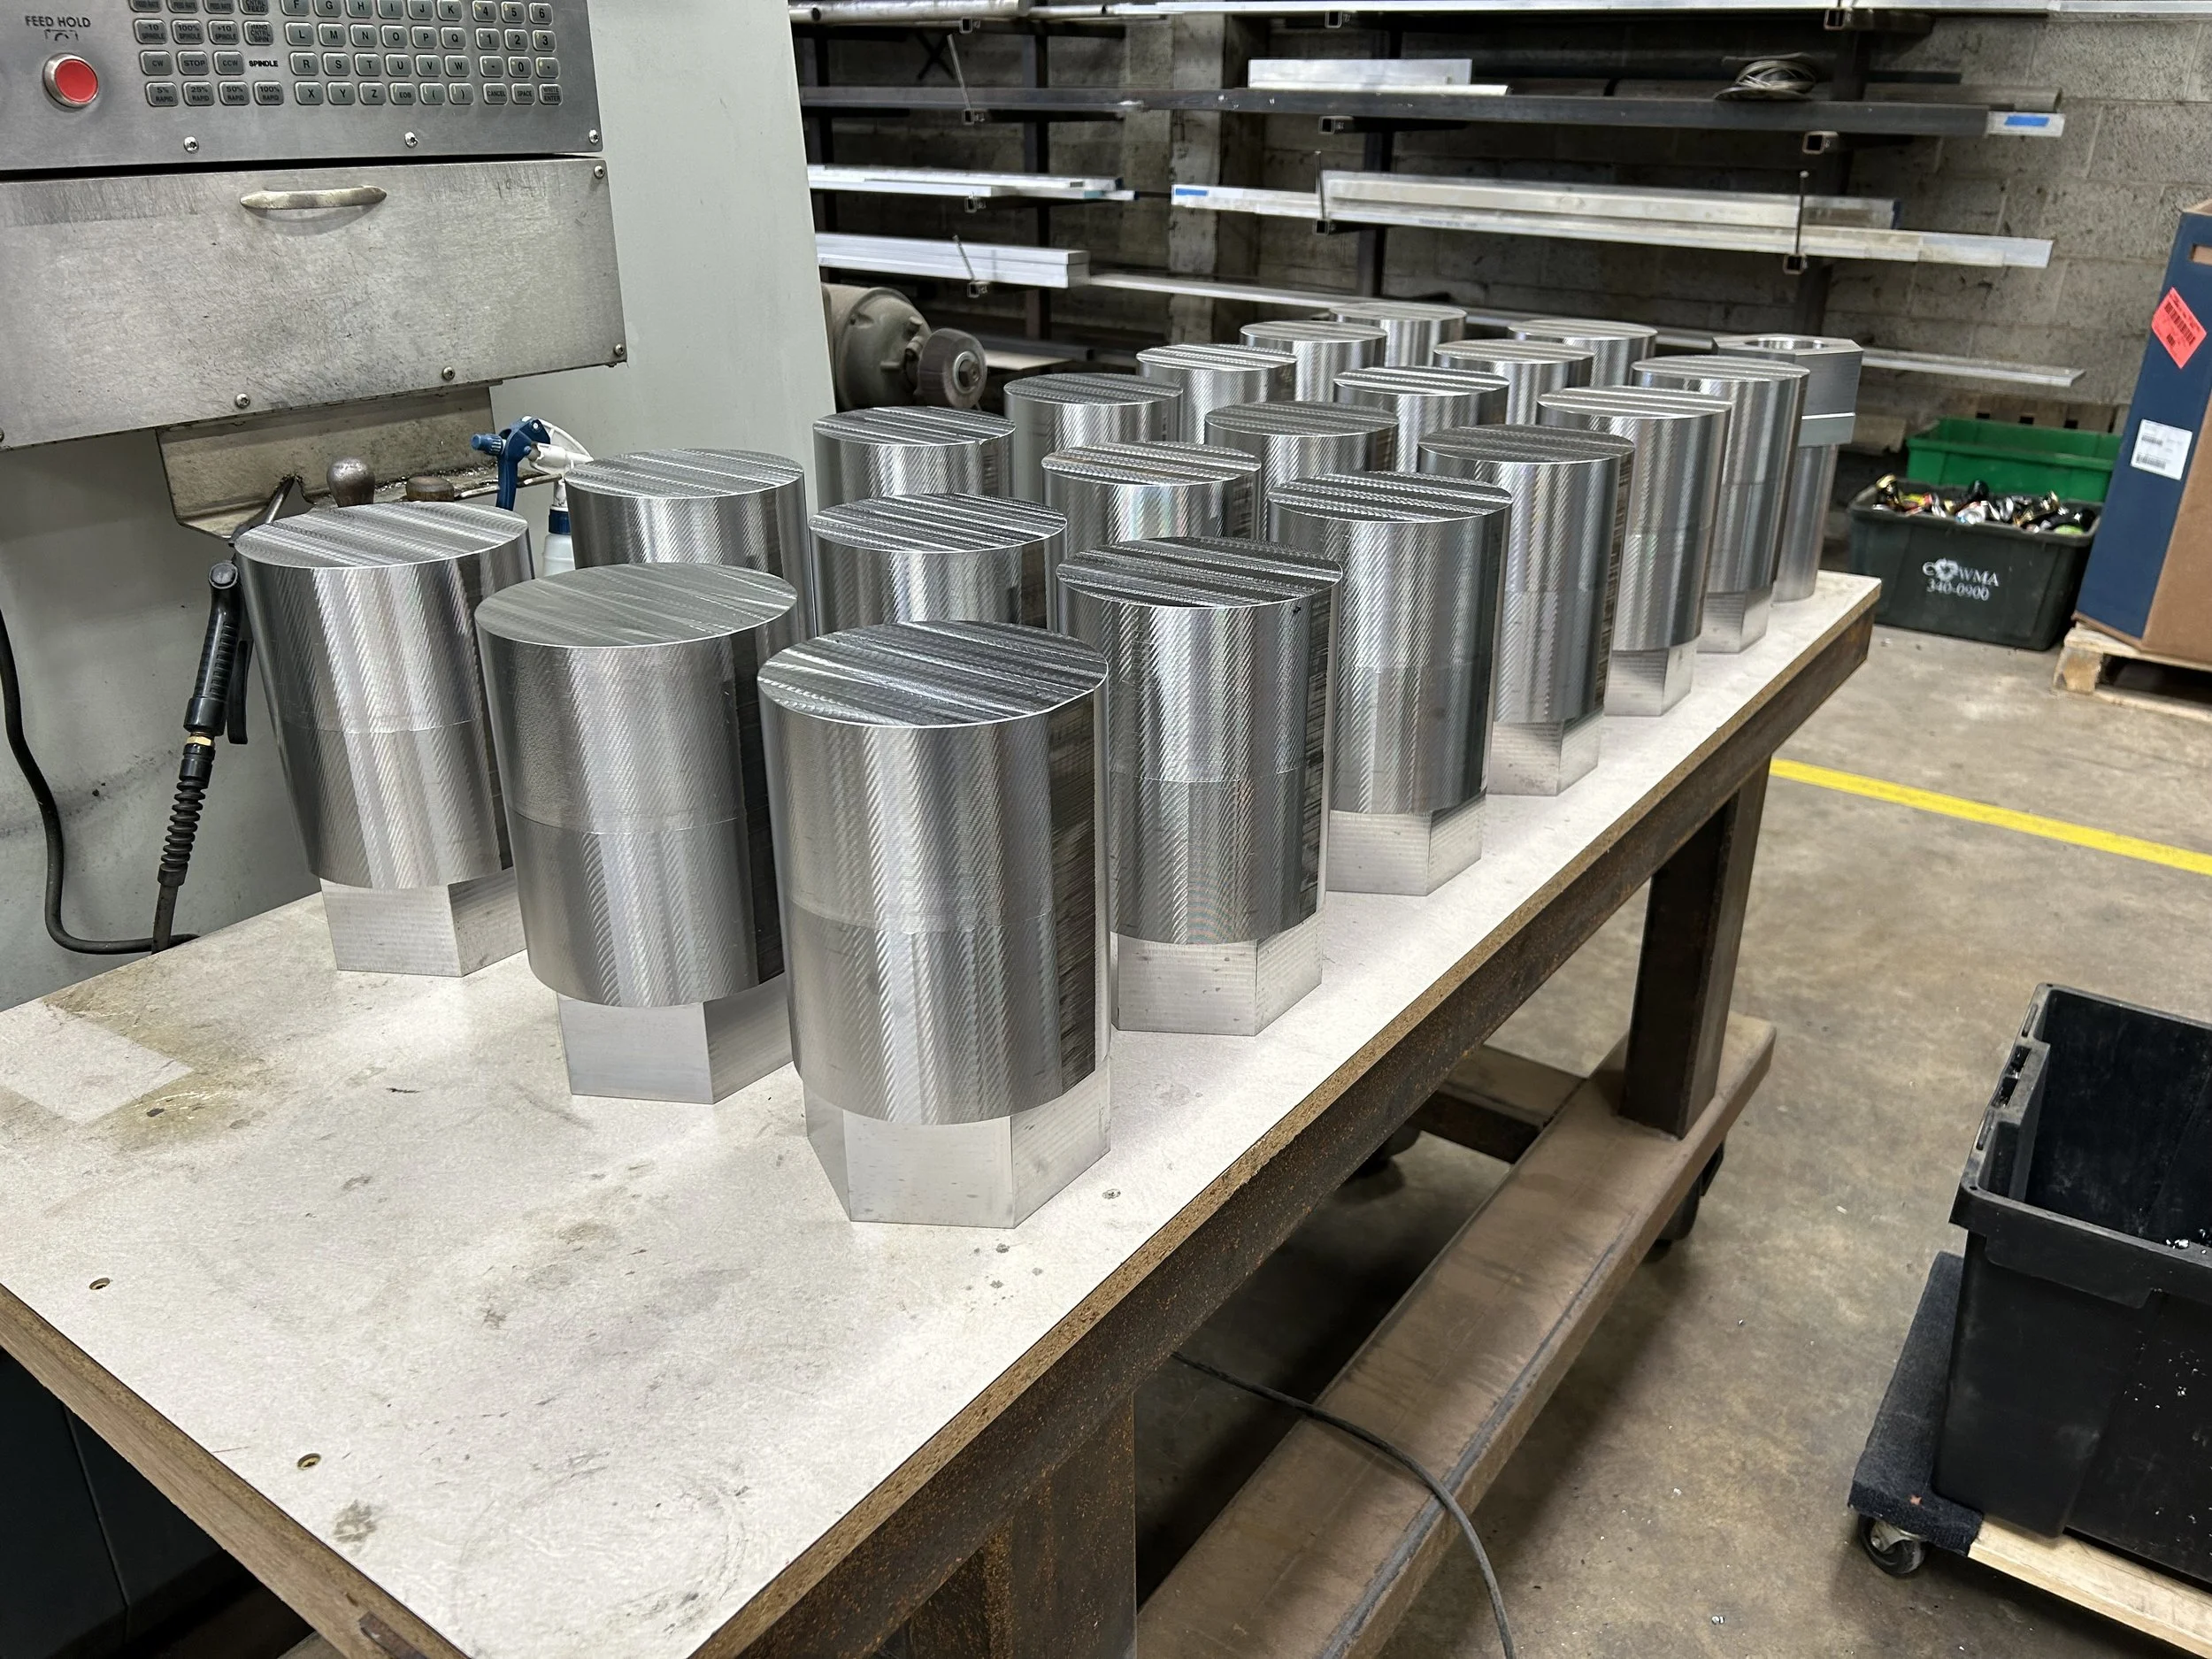
Completed blanks ready for threading.

Blanks.
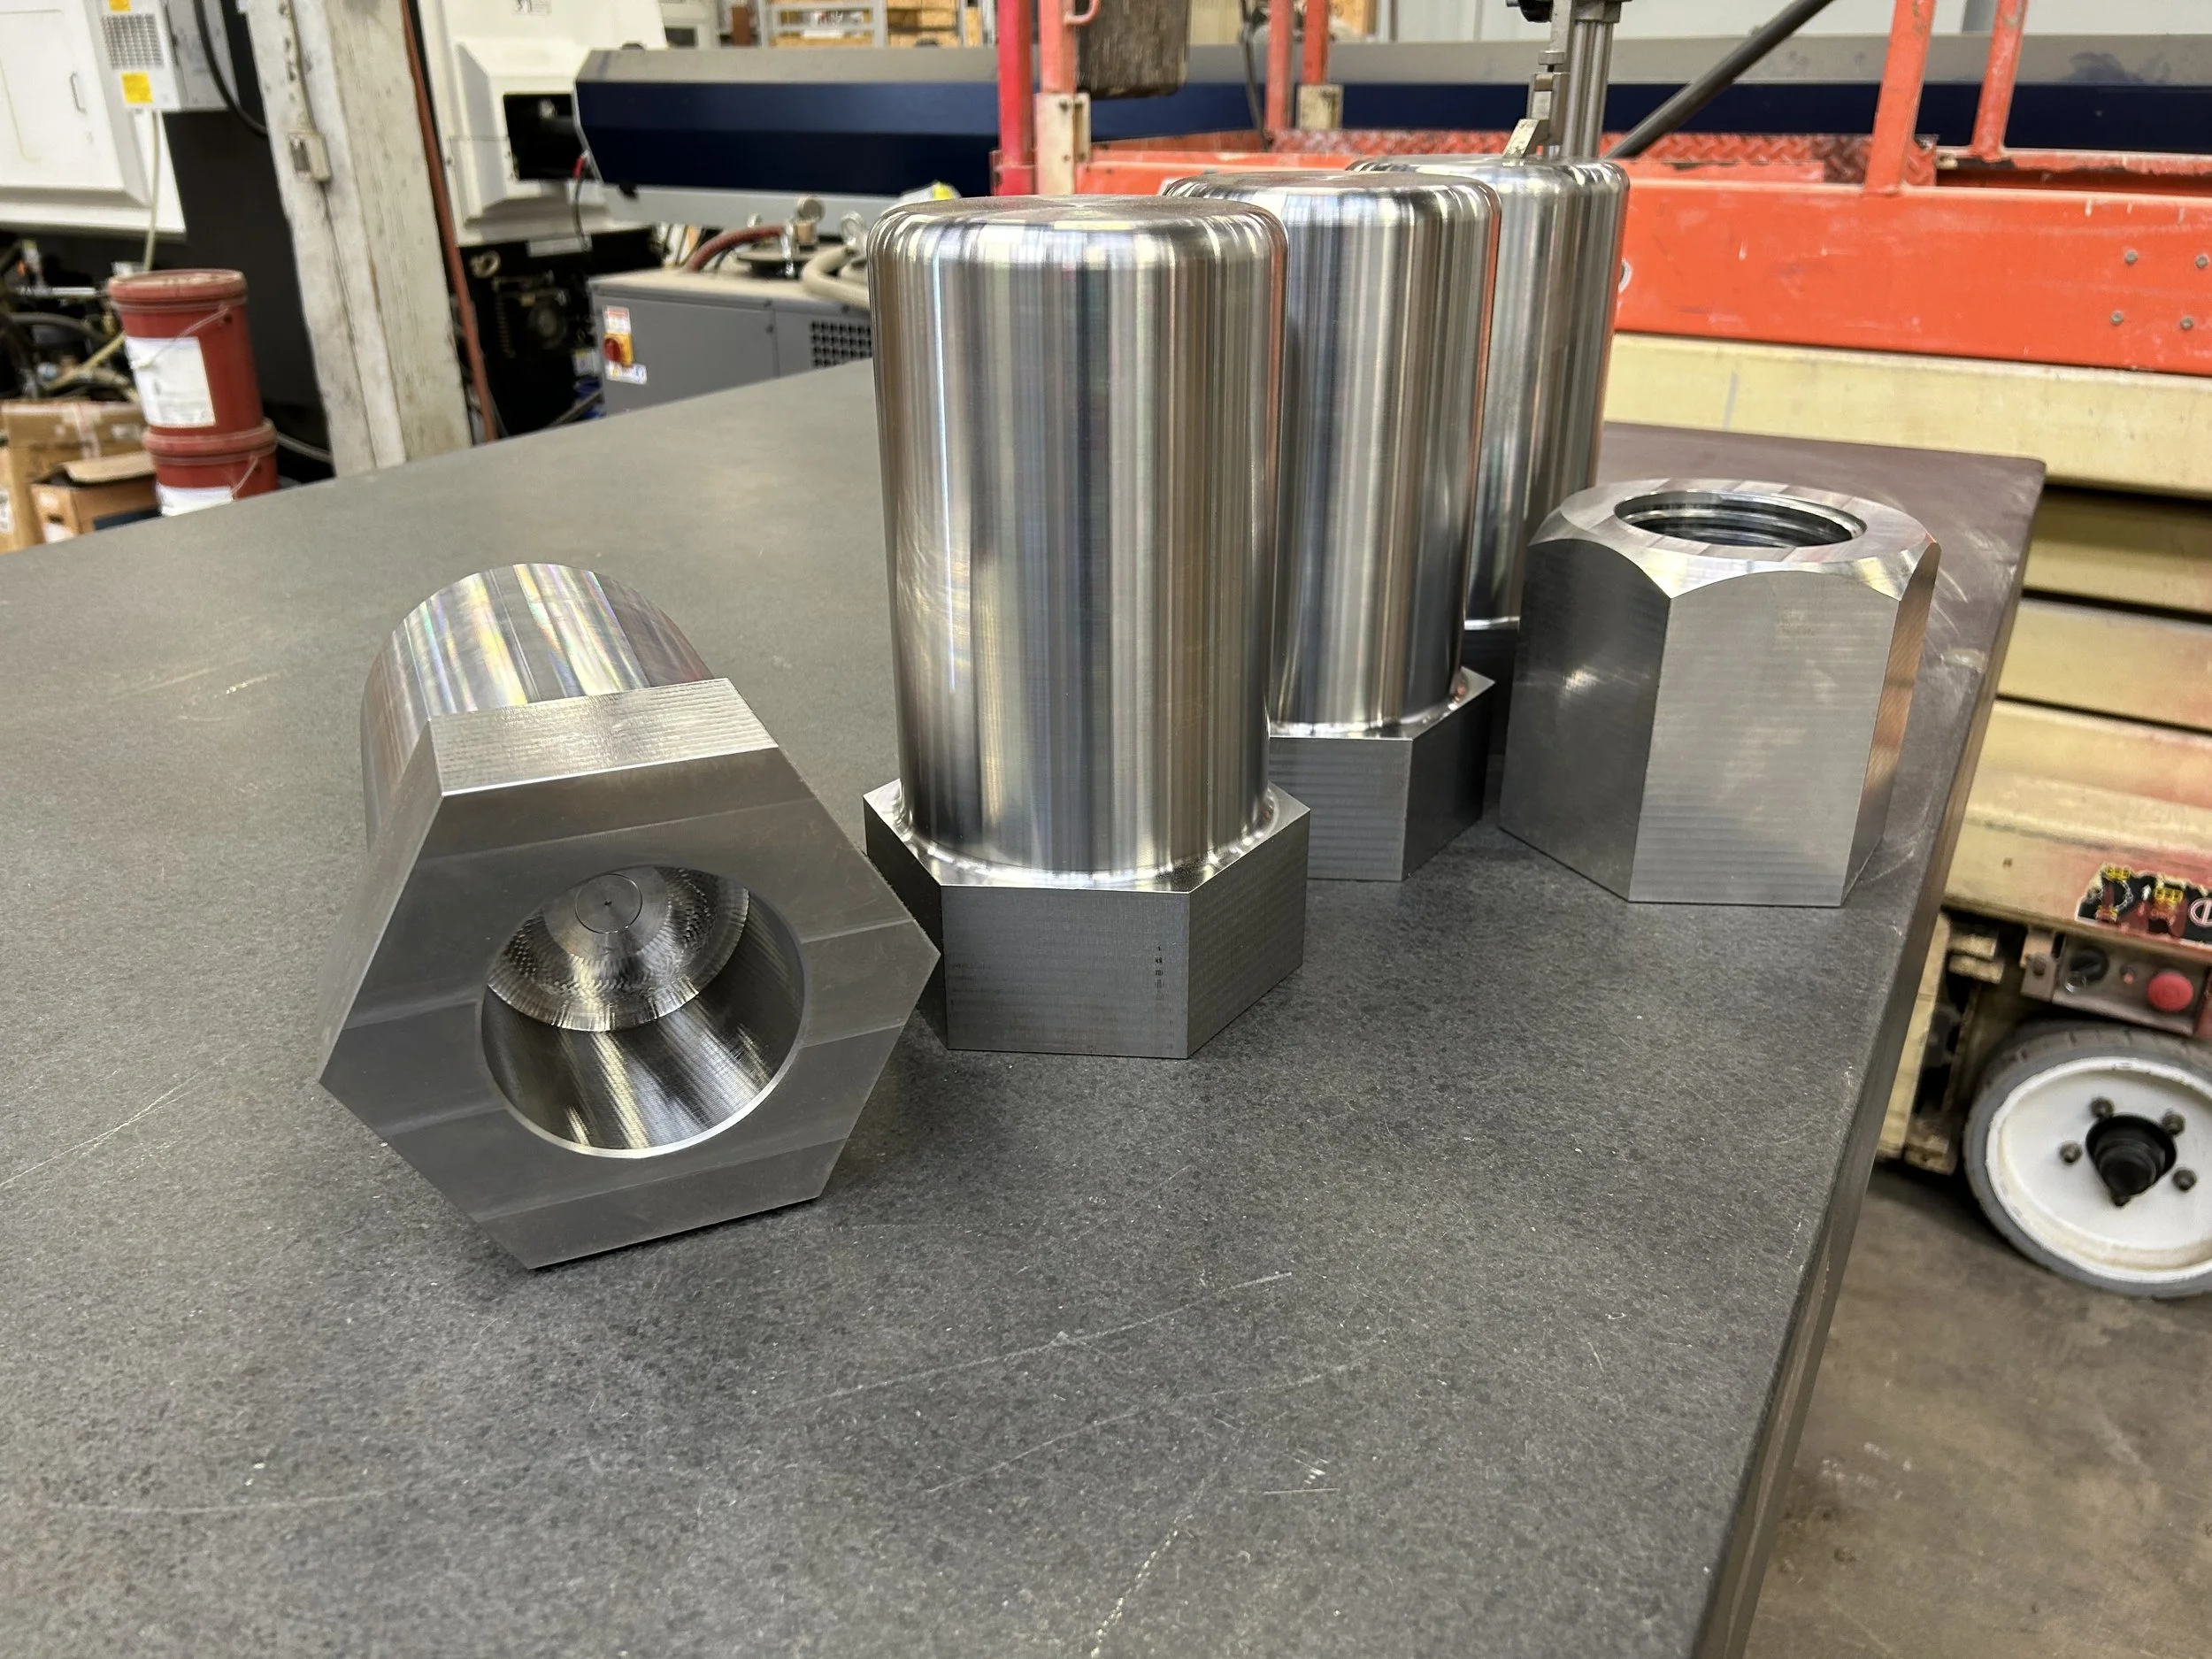
These are enormous parts - roughly the size of a watermelon.

The fixture we used to hold the cap nuts while we machined the threads.

A finished threaded cap nut.

Each nut required a tolerance check with "go/no-go" gauges to verify the tolerances of the threads.

This allowed us to verify that the nuts would fit perfectly onto the eyebolt threads. They did!

Finished main nuts, which do the lion's share of the work to hold the tension on the cables.

Final assembly: the last step before we delivered these to the client was painting by a VDOT-approved finisher.